Friday, September 30, 2016

Chatty GRWM || Soft Gold Eyes & Red lips || Using my Ride or Die tag products!

In which I use most of my answers to the Ride or Die tag to do my makeup! I thought it would be a good way to show you the products in action, instead of just listing them out and not showing how they perform at all. Hope you enjoy the look and seeing some of my holy grail makeup products!

Click here to watch in HD, or watch below:

Thanks for watching!

Wednesday, September 28, 2016

Review || Face Off Makeup Removing Cloth

Hi guys! Recently I was given the chance to test out the seemingly magical makeup removal cloth from Face Off. You've probably seen similar products, especially the Makeup Eraser, as well as a Sephora Collection branded makeup remover cloth. I had never tried any of those, but was excited to test out this one, and see if it would live up to the hype about these reusable cloths!

Face off cloth

These cloths really do seem to promise magic, since all you do is wet them with warm water, and then gently remove all your face makeup with no products and no waste such as cotton pads or makeup wipes. I'm fuzzy on the details, but I think it's something about the microfibres that are supposed to grasp onto makeup particles and dirt and wipe them away.

product description

At first touch, this cloth is weird. It's not your usual terry cloth towl material. It's soft, but weird, like a lens cleaning cloth, smooth, and yet somehow finds dry bits to snag onto on my fingers that my skin can't detect alone. Dry, the cloth is almost unpleasant to touch, and so so weird. Wetted, it feels a little softer and more velour-like. Also, there is a smoother side and a more textured side to the cloth, for more gentleness or a little more exfoliation... but it's going to be gentle no matter what.

dual sided cloth

So does it work? Kind of...

I found that it removed my face and colour makeup pretty well—like my foundation, concealers, and eyeshadows—but I still had to go in with a proper makeup remover to get off my waterproof mascara. It did seem like it was taking some of it off as I was removing everything else, but I don't want to rub my eyes too hard with anything, and I felt it would take a lot of friction to use the cloth alone!

It also feels really weird to use nothing but water on your face and consider it clean, but after checking with a cotton pad and micellar water, my face makeup really was gone, so that was pretty cool. However, since I can't get off my mascara with this cloth, I don't see it as a replacement for my micellar waters and makeup removers. I could see it, though, as a great solution to makeup wipes, which also do not generally work well on mascaras. This could easily eliminate a lot of waste and work great to get most makeup off on those lazy nights, or to make sure you have a fresh, clean canvas in the morning before makeup.

size of cloth

The cloth itself is a square the size of your usual face cloth. You can quickly give it a hand wash and rinse with normal soap after each use before hanging it to dry, and then to deep-clean it, you can just pop it into your washing machine. Just don't use fabric softeners or bleach, as those could damage the cloth. Each cloth is good for about 3 or 4 months of continuous use, but after that, they suggest replacing them.

The Face Off cloth can be bought online at FaceOffCloth.com for $12.95, plus shipping, though shipping is free if you buy 4 or more. Or you can get it for $14.99 CAD with free shipping from Showcase.

Thanks for reading! Let me know if you have tried this, or any of the other makeup remover cloths, and how it worked for you!!

Saturday, September 24, 2016

Chatty GRWM || Matte Browns (almost) All-Drugstore!

In which I put a bunch of brown shades on my face, and it works out really well =P I realise the lips aren't the brownest brown that ever brown'd, but it's about as brown as I feel comfortable with the lips being. I love how the eyes came out, and I hope you like the look too!

Click here to watch in HD, or watch below:

Thanks for watching!

Monday, September 19, 2016

REVIEW || Travalo Classic HD

Hey guys! Today's review is on the Travalo Classic HD, which many of you may already have heard of. The Travalos were pretty popular and widely talked about on blogs and Youtube a couple years ago, but I haven't heard much recently. I've also never tried one myself, so when I was asked if I wanted to test and review one, I obviously took the opportunity.

in package

While I was sent this product for review, I have not been paid to talk about it, and as always, all opinions expressed here are honest and my own. =)

out of package

So in case you haven't heard of the Travalo before, it's basically a cute little travel-friendly way to carry your favourite perfume with you! Both the Classic and the Milano (Which seems to just have a fancy case around the Classic body) hold 5ml of perfume (65 sprays), are TSA approved, and have a spray top—which is great, because every other perfume application method is pretty annoying, in my opinion! They're also really easy to fill with your perfume of choice! You just gently pull the spray top off your perfume bottle, so you just have the straw-like portion, like so:

Then you position the bottom of the Travalo over the pump of your perfume and pump to dispense the product right into the Travalo. It's really easy, mess-free, and there's a little window on the side of the Travalo so you can see when it's full.

Bottom of Travalo: where you pump the product into the vial

The filled Travalo is super small and easy to store in a purse, makeup bag, or whatever else you might want to carry it in, and also really light. I also like the metal (aluminum?) material the body is made out of, because it feels really sturdy and safe, unlike a glass (or cheap plastic) bottle. And of course, the metal caps stays on well, so your perfume isn't accidentally spraying all over your other belongings!

Travalo with perfume inside.

I have lots of perfumes, but I have my Travalo filled with my Paris Hilton perfume because I'm really basic like that, but also just because it's a perfume I never ever get sick of. Lots of perfumes give me headaches, or just smell too strong or too floral or too sweet sometimes, but I really adore the original Paris Hilton perfume because it's a light, perfect blend of sweet, floral, and fruity. It just smells like happiness.

The Classic HD comes in a 10 great colours: Silver, Gold, Red, Black, Perfect Pink, Plum, Hot Pink, Brown, and Blue. The black and blue (the one pictured in this post) are my absolute favourites, but they're all really pretty! And the Travalo Classic HD retails for ~$19.99, which is pretty reasonable. You can purchase all the colours on Travalo's own site (for $19.99 USD), or a few of the colours are available at London Drugs (for $15.99 CAD) or Ulta.com (for $15 USD). A whole list of stores stocking Travalo can be found here.

Classic HD - 10 colors
Inside the aluminum case

Anyways, I think I've covered everything I wanted to say. the Travalo is a pretty basic product, but if you are someone who wears perfume everyday, or someone who travels a lot, then I think this could easily be an essential for you. Everything about it is so easy. And I could easily see having a couple different ones so you have your pick of your favourite perfumes at any time!

P.S. If you're wondering what the inside of this bottle looks like, I didn't realise until I saw this picture, but you can actually remove the bottle from inside the metal case. From the sounds of it, you can also switch the internal vials between the different Travalo models. This is what it looks like inside:

Thanks for reading!


Saturday, September 17, 2016

GRWM + VLOG || Urban Decay Metrotown Store Opening Event || Plum & Gold Eyes w/ Pink Lips

In which I share some pieces of my day with you from the day of the Urban Decay store opening party at Metrotown, including a GRWM of my makeup for the event.

I didn't finish the vlog properly, which I explain at the end, but I filmed a lot before the event, so I wanted to share that with you anyways. There's cute doggy footage!

Click here to watch in HD, or watch below:

Thanks for watching!

Thursday, September 15, 2016

REVIEW || Nivea Skincare || ChickAdvisor #NIVEAMustHaves Box

Hi guys! Today's post is going to be a review of several products from Nivea that I was sent thanks to ChickAdvisor! I was sent this box of products for free in exchange for my reviews, but of course my review is not biased, and is completely honest and my own, as always. So I'm just going to tell you some quick thoughts on each product. First, here's a look at what I recieved:

nivea chickadvisor package

Nivea Creme Care All-In-One Facial Cleansing Lotion

This is an interesting product, since you can use it like a regular cleanser (apply, massage into skin, and rinse off) or almost like a micellar water (massage into skin, and then wipe off excess with cotton pad). I haven't tried wiping it off, and have only used it as a facial cleanser, as I've had problems with similar facial milk products in the past, but as a cleanser, I really like it!

cleaner back

It doesn't foam up but still leaves my skin feeling clean, but never dry. It's basically a lotion that also cleanses your skin, so I could see it being great for dry skin, but I love it on my combination skin, even on oily days! It doesn't sting eyes and really does help to get makeup off, though I tend to go in with a makeup remover to get waterproof mascara off first anyways.

My biggest problem with this is the scent. Almost all of the Nivea products I was sent have the same, distinctive smell, and unfortunately I'm just not a fan. In this case, though, that won't stop me from using the product, as I love how this cleanser makes my skin feel fresh, clean, and cared for. This product retails for $8.99.

Nivea Creme Care Facial Cleansing Wipes

wipes

These were just okay for me. They definitely didn't do anything to remove my waterproof mascara, though they did an alright job with the rest of my makeup, which is too bad, because they do claim to "remove even waterproof makeup without rubbing."

wipes back

They did alright though, and my skin felt clean enough without really being greasy or dry. Most of the time I think most people reach for facial wipes as a starting point in their face routine or as a cop-out to doing a proper face routine on a lazy or late, late night, so these would be alright for that, but I wouldn't expect them to get your waterproof eyes off every night! A pack of 25 wipes sells for 8.99

Nivea Creme

creme

The thing that started it all. This is the basis for most of Nivea's products, or at least the ones that I received to test out. It's a fairly thick moisturizer, but it manages to feel pretty light and non-greasy when I use it as a hand cream. I haven't used it on my face yet because my skin just doesn't seem dry enough, but that is a use for this, along with hands and anywhere else you get dry spots.

creme back

It absorbs really quickly, which is great. I've tossed this tiny tin into my purse for on the go. The info card I got with this box doesn't list the 10ml size as an option, though, which is too bad, because it is such a good size for travel, and could easily be refilled from a larger pot after it runs out.

It does have the same odd Nivea scent I mentioned earlier, which isn't a favourite, but it works well, and is certainly isn't the worst thing I've smelled. It's hard to describe; I wouldn't call it sweet or floral or fresh or musky... it's a little powdery and old-woman smelling maybe, but like... a nice clean old woman. It could be better, but it could be so much worse. It looks like this comes in three sizes: 150ml for $7.99, 250ml for $10.99, and 400ml for $13.49.

Nivea Protect & Care Anti-perspirant/Deodorant

deodorant

I'm not sure how long this has been out, but it's a similar idea to the Dove deodorants infused with moisturizers to care for your underarm skin as well as blocking odor and moisture. It's a good idea, since anti-perspirant ingredients can be hard on your skin. Unfortunately for me, this has the same scent as the other Nivea creme products, but this is by far the most concentrated version of the scent. It's stronger even than the basic creme, in my opinion.

deodorant back

It does seem to work well. It feels quite nice and almost soothing on the underarm area. Maybe I can get used to the smell, but I really wish there were other scents available! Also, I do feel like the actual product stick inside is quite narrow and small. The package tapers at the bottom, so of course the whole stick has to be narrow to fit inside properly, so that packaging seems a little misleading. But it works well. If it was on sale for less than other brands I trust I could see picking this up in the future... especially if they branch out with some nicer scents! This deodorant retails for $3.99

Nivea Essential Lip Balm

lip balm

After smelling everything else I was super worried about testing this lip balm, as I didn't want to know what Nivea creme tastes like... Luckily, this lip balm smells nothing like anything else!! It barely smells like anything at all, except for a very delicate sweet smell, like a slightly lemony sugar, but pretty indistinguishable unless you really try to smell it on your lips, it also doesn't have a flavour, which I'm sure people will like.

lip balm back

From the moment I first put it on I've fallen for this lipbalm! It hasn't quite replaced my all-time favourite (the First Aid Beauty Lip Therapy balm) but it's a close second, I think. It's thick without being heavy, it's not greasy or oily, but also really feels like it's protecting and coating your lips. It's so comfortable and I will definitely be keeping this buddy in my purse all fall and winter to protect my lips from chapping (which they are prone to most in the colder weather). I definitely recommend this, it is by far my favourite Nivea product I've tried so far, and the best drugstore lip balm I've tried. It retails for only $1.99

***

Did you get this PRC box as well, or have you tried any of the products I mentioned? I'd love to hear your review, so leave your thoughts in the comments!

Thanks for reading!

Tuesday, September 13, 2016

TUTORIAL || Warm Fall Eyes || Ft. BH Cosmetics Shaaanxo Palette + Kiss Lashes

A photo posted by Kristy (@glitterocd) on

Hi guys! I posted the above picture of a really gorgeous red/orange-y, fall leaves type look on instagram just over a week ago, and loved it so much I wanted to recreate the look for you in a tutorial! Also, I attempt the impossible (for me) and use some pretty, fluttery lashes from Kiss. Hope you enjoy!

Click here to watch in HD, or watch below:

And ny the way, this is the picture I was taking at the end of the video:

A photo posted by Kristy (@glitterocd) on

Don't forget about my Palmer's Skin Therapy giveaway! It closes in just a couple of days, so click here to enter!

Thanks for watching!

Sunday, September 11, 2016

TUTORIAL || Autumn Plums

This is a great smokey look that I think could easily work for daytime in many cases because its still light and pretty as well.

I really love how this plum-y look came out, and I hope it inspires some different fall looks for some people. I love warm fall tones like browns and oranges, but berries and plums are fun and so fall too!

Click here to watch in HD, or watch below:

Thanks for watching!

Thursday, September 8, 2016

Real Talk || My Septum Piercing & Healing Experience

Hi guys! Today's post isn't going to be a review or makeup video, instead, as the title has probably tipped you off, I'm going to talk about my experience getting my septum pierced a couple months ago, and how it has healed up. I'll try to do this as logically as possible, and feel free to leave me any questions you might have in the comments.

Just as a disclaimer, I am not a piercer or an expert. Aside from my lobe piercings which were done when I was maybe 2 years old, my septum is the only thing I have ever gotten pierced, so I won't have all the answers, but I wanted to share my experiences. Your piercing journey may very well be different, harder, or easier than mine, as everyone's body is different.

first picture

Why I Chose & Got My Septum Pierced

Before I start talking about the actual piercing, I wanted to quickly mention why I got this one done. First off, for me, this wasn't something I'd been wanting for a long time, which is many people's reason. But my sister had gotten the piercing a couple months ago, about the same time that Karissa Pukas (YouTuber, if you don't know) also got hers done, and while I thought they were pretty weird at first, the look grew on me pretty quickly. You may also have noticed more people wearing (often fake) septum jewellery on Instagram and in magazines and such, so its really not as stigmatized as it once was. There are lots of jewellery options, whether you want something very out-there, bling-y, punky, or dainty.

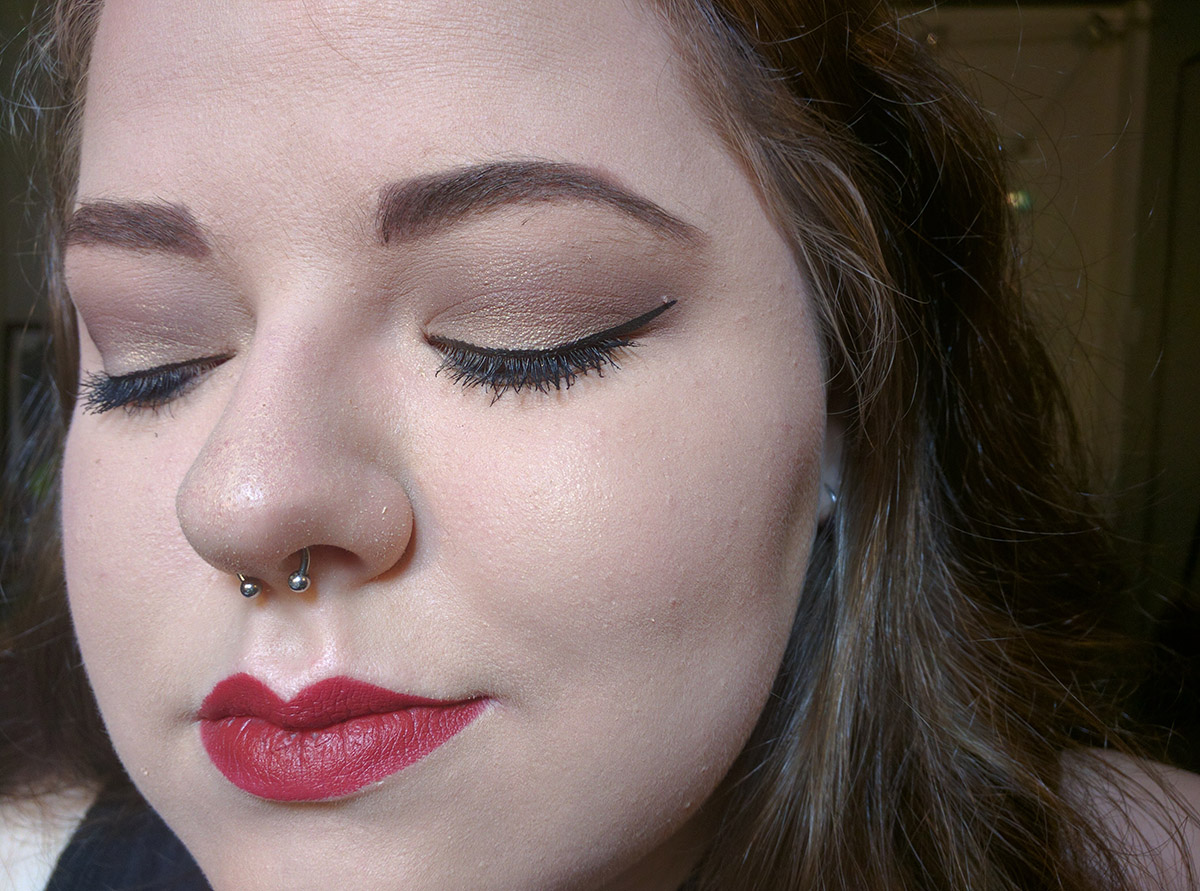
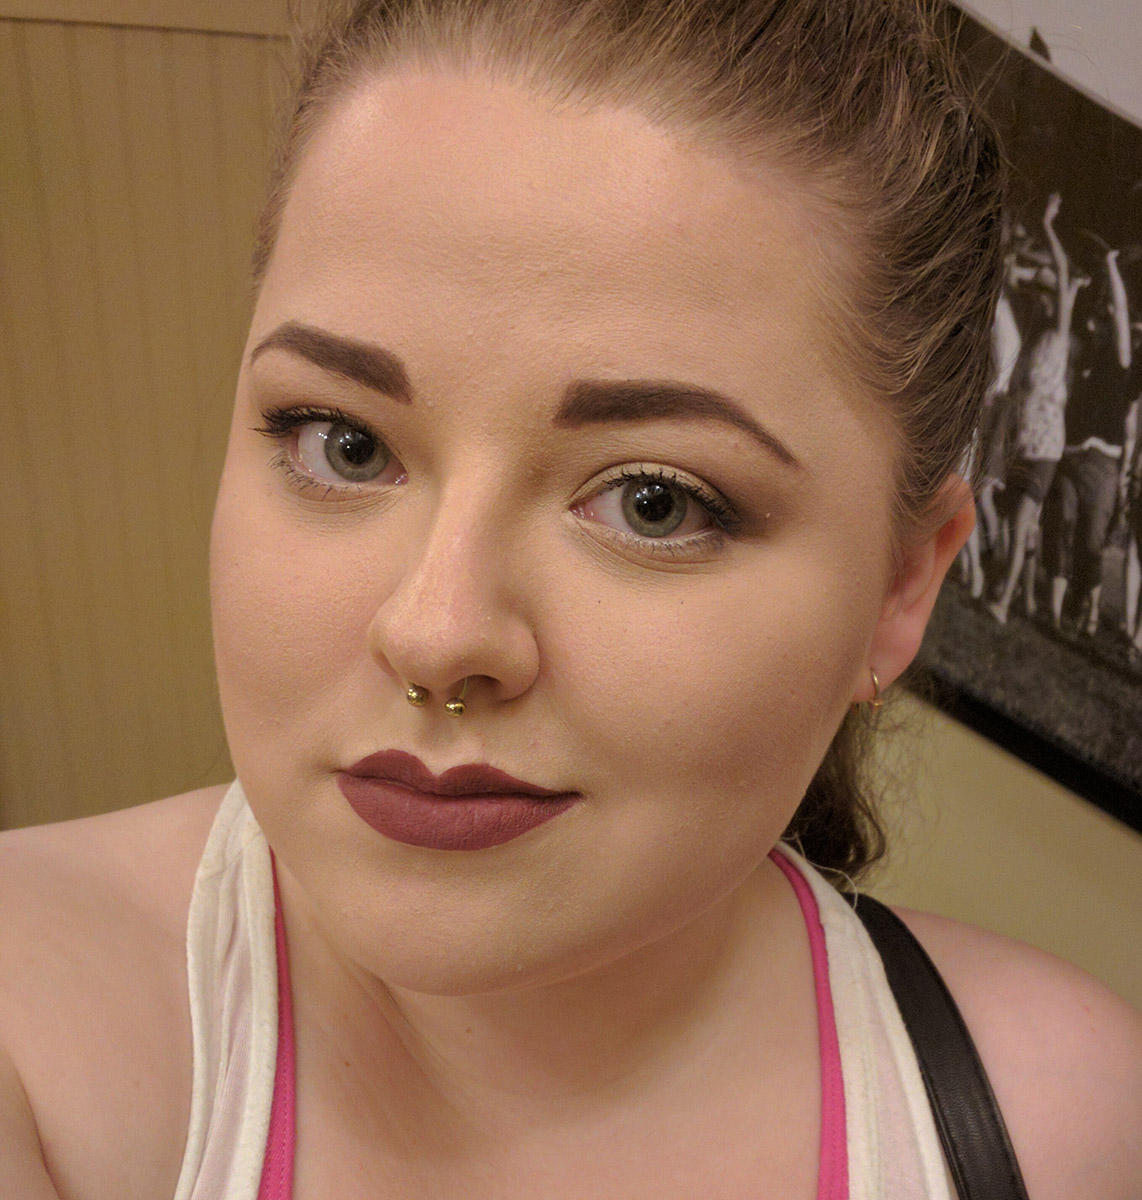
It's extremely easy to hide by flipping up a circular barbell (like the one in the picture above), or by putting in and flipping up a retainer (which is a small, usually staple-shaped piece). While I love the piercing, and don't want to hide it, there may be jobs I'd want in the future that wouldn't like my piercing, so that hide-ability is a huge bonus. Similarly, should I ever decide I'm done with it, I can take it out, and it will heal up, but even if here is a scar, it will be up inside my nose and no one would ever know I had the piercing! (Though at this point, I don't see that happening. I really do love it)

Finally, I'd both read and been told by my sister that it wasn't very painful (no piercing is going to be truly painless... they punch a hole in your body with a sharp needle. You're going to experience at least some very real discomfort at best!) This is because it doesn't go through your nose cartilage, but in the very front area of the septum is the "sweet spot" which is just skin, and very few nerves. It even heals pretty quickly, though there seems some debate on the internet about healing time. My piercer, along with many places online, say that the healing time is about 6 weeks. That's not even 2 months!

I'll get to when mine felt healed a little later, but all in all (unless you believe the people who say its actually 6-8 months, not weeks), it's a very friendly piercing with low levels of commitment for everything: pain, healing time, ease of hiding, and a lack of scarring.

This is also how I—unintentionally—convinced Brit she should get the piercing as well! She also loved the idea of the "inconsequential rebellion." We were never a rebellious pair.

close up

The Tattoo/Piercing Studio and the Piercing exprience

Anyways, for me, choosing a studio to get pierced at was easy because my sister already had 2 piercings from Sinister Skin and was really happy with the place and piercers, so I just took her recommendation. I'd never been in a tattoo place before, so it looked a little scary when we went in and I think Brit almost backed out, but the piercer (Justin) was really friendly and professional, we signed the required forms, and went into one of the piercing rooms together.

We'd gone back and forth about who should go first, and up until the last minute Brit wanted to go first so she wouldn't be freaked out by seeing what was going to happen. That was fine for me, since I am better off knowing the procedure beforehand, which is why I had googled it the night before. But, as I just alluded to, I ended up going first because I'm clearly more Gryffindor than Brit (Slytherins can be brave too, at least compared to RavenPuffs =P).

Sinister is a pretty small studio, and they don't have piercing options, everyone gets a basic, sterile, surgical steel circular barbell for their new septum piercing, which is fine. The piece is really small, and while it wasn't a favourite at first, it's currently my favourite ring I own! It definitely grew on me. After showing us the jewellery, I lay down in something like a dentist chair, Justin put on gloves, and then started by sanitizing the area just inside my nose with alcohol. This is pretty gross, alcohol is a strong scent at the best of times, never mind IN YOUR NOSE, and you will want your mouth open to breath now, and really for the rest of the procedure.

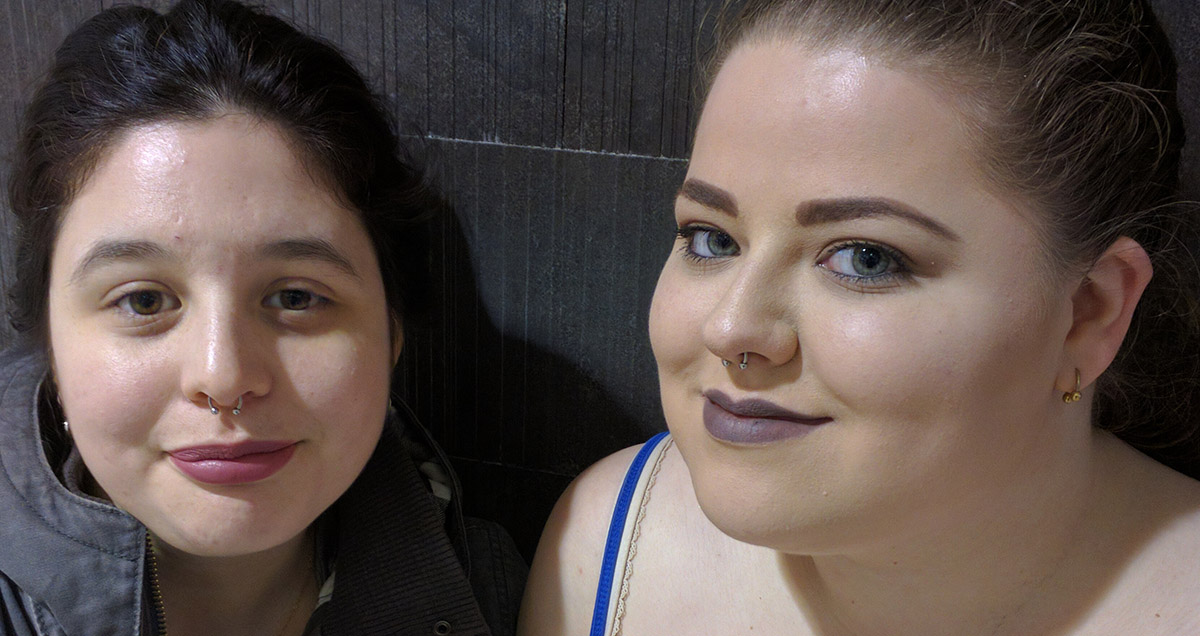
Next, he put the piercing clamp in my nose which looks a little like a pair of scissors, but with a tube at the end that lines up where the piercing is going. This is super uncomfortable clamped in your nose, and is possibly the worst part, not the actual piercing, as this stays clamped in your nose for a few minutes. Justin explained that he tries to pierce as high in the nose as possible, which I'm happy about, because the piercing doesn't hang out of my nose too far, which I love. That said, even by the same piercer, a piercing will look a little different on everyone because of their unique shape. For example, both my and Brit's piercings are placed high in the nose, but mine hides away a lot more than her's, as you can see below.

two examples same piercing

Finally, the needle goes through the guides on the clamp, and apart from a sting or a pinch when it came through the other side, I didn't really feel the piercing itself. I did, however, have a weird tight feeling that there was something in my skin. I felt some weird tugging when he threaded the jewellery through the new hole, and I could still feel the new weight and some tightness on my nose, which was a bit uncomfortable, but not painful. I asked if it would go away soon, and he assured me it would. I think the last step was to resanitize, but this time with "green soap," because alcohol would have burned like crazy and aggrevated my new wound.

I got up, and at this point, after getting to check out my new piercing in the mirror, I got really light-headed. This turned to dizziness, nausea, and sweating. Luckily, David was there to lean on, and the piercer said it was pretty normal for some people and offered me a lollipop, which did help. I'm sad I didn't really get to watch Brit's piercing, since I was feeling so shit, but I think hers hurt a little more than mine and definitely bled a bit more, but she had way less weird aftershocks than I did, so I think we both did pretty well. I felt much better by the time she was done as well, and we paid and left after Justin went over cleaning and care instructions. Of us were done in less than an hour, including at least 10 minutes of waiting when we first arrived!

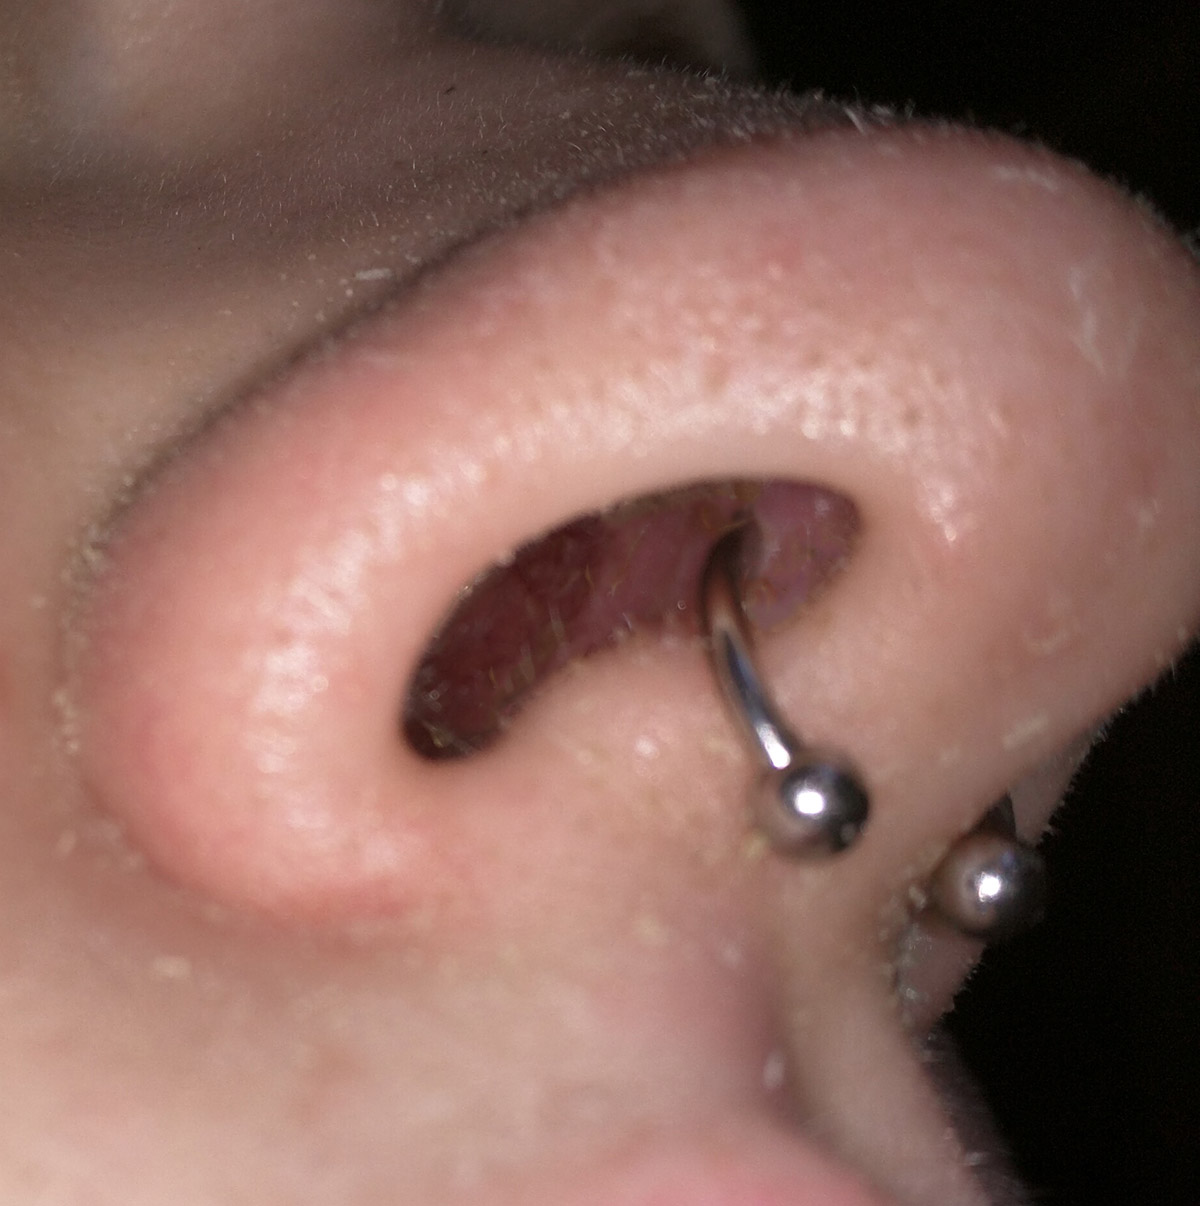
Where the piercing sits in my nose. I apologize for blurriness and also if the inside of noses freaks you out.

where the piercing goes

Pain & Healing

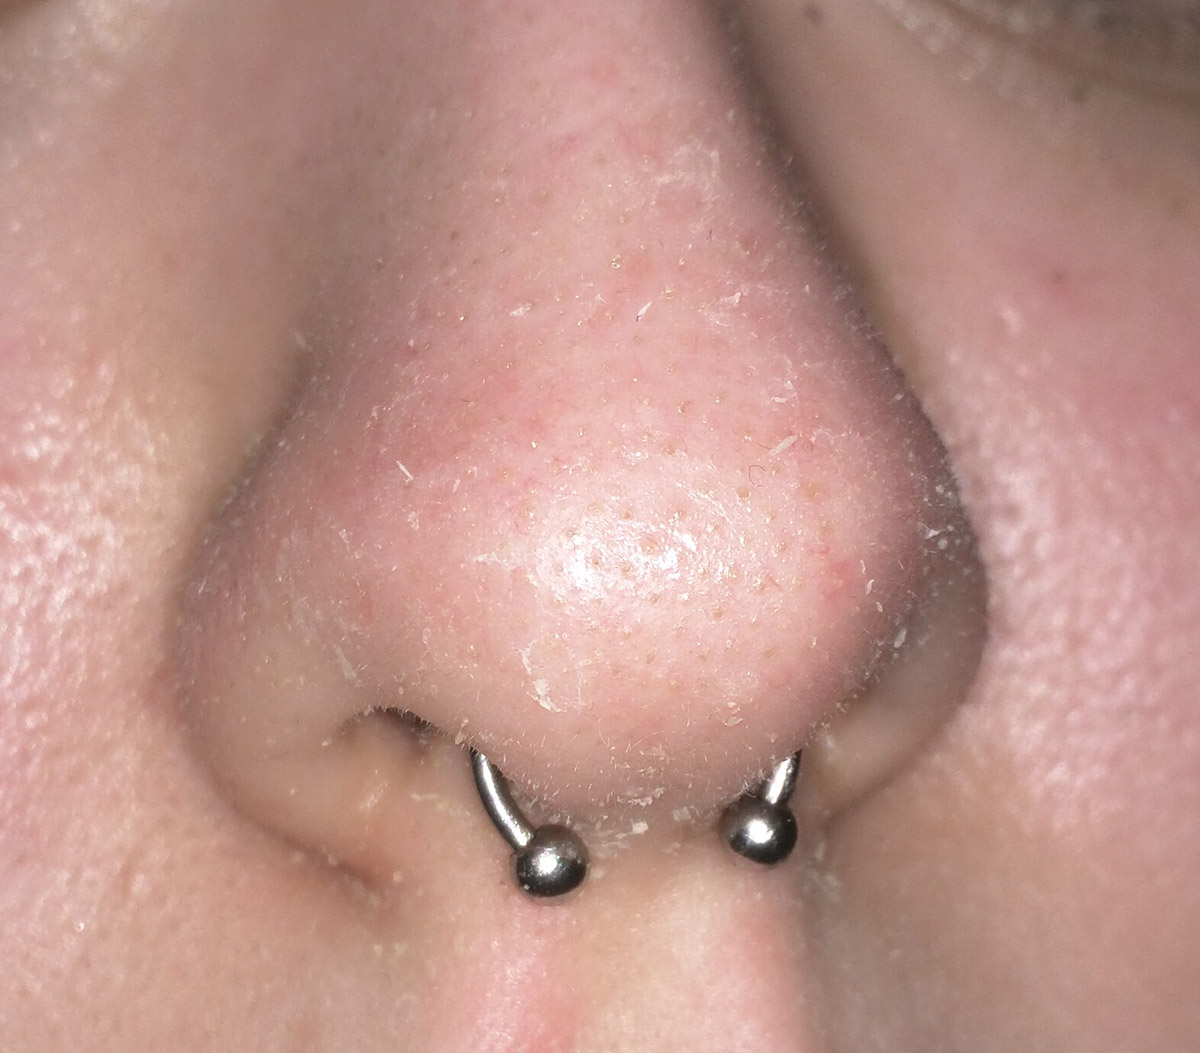
I feel like I had a really good run at healing. I didn't get an infection, even though I stopped using the sea salt solution pretty early on. I probably should have talked to the piercer about this, but it was making my nose seriously dry and flaky and really really itchy, so it seemed for the best to just use warm water to clean it, since the dry itchiness was just making it touch my nose more than I should! Besides, lots of people on the internet including the r/piercing subreddit swear by the LITHA method... which stands for "Leave It The Hell Alone."

Weird flaky nose skin, which healed up pretty quickly after I stopped with the salt:

dry nose skin

For the first little while, it was a bit painful or annoying to move my mouth much (eating, talking, laughing, smiling, sneezing, etc.) because my nose moves a lot with my mouth, and that caused some tugging on the jewellery as my septum skin got used to accommodating the new steel bar I had had inserted into it. This got better quite quickly, though it started to seem like forever before it got better. I'd say I had full range of motion with my face back after 2 weeks, though I was almost there at 1.

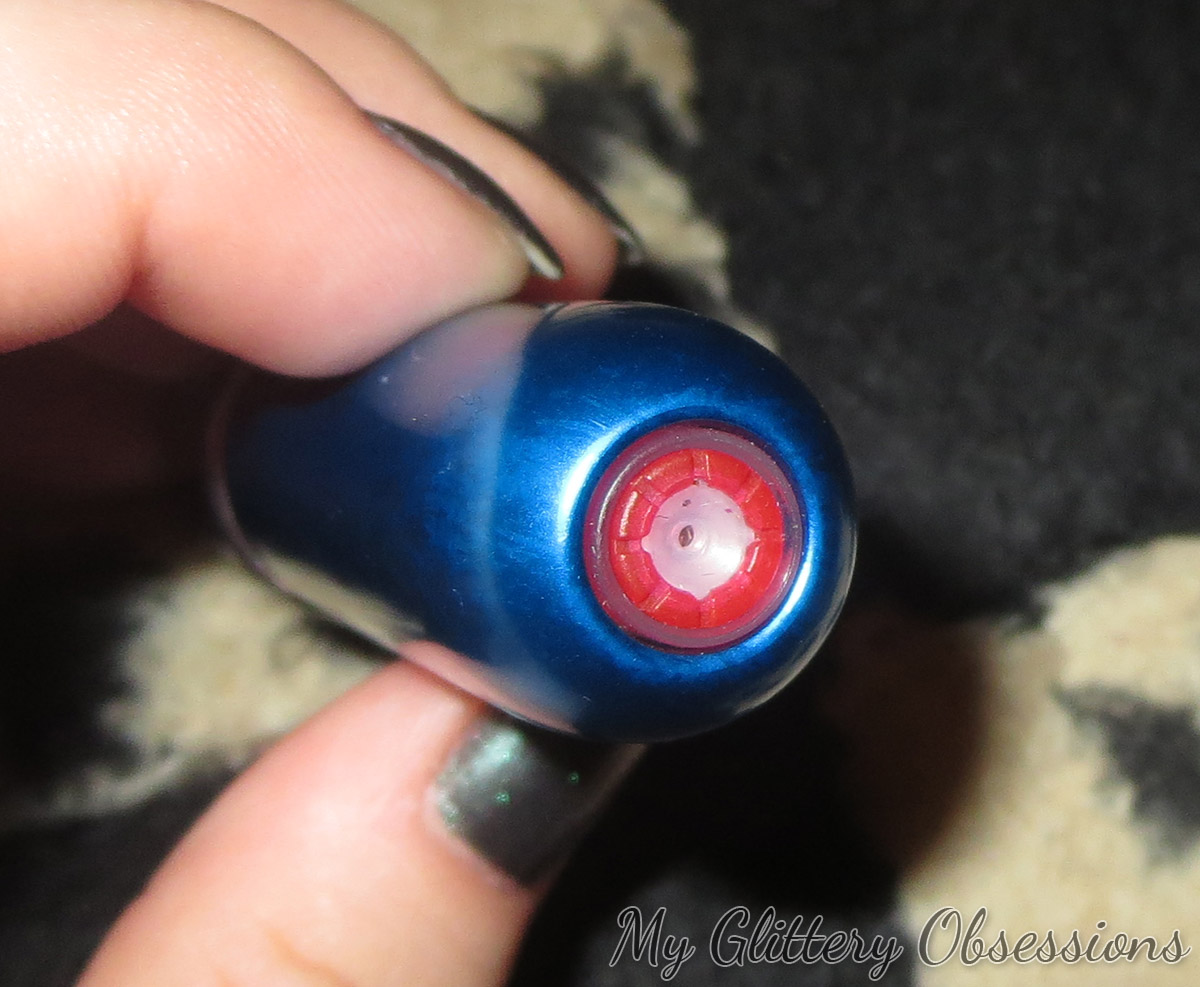
At 2 weeks, I had also developed the (probably bad) habit of playing with the jewellery with my upper lip. And by 5 weeks I was able to touch, poke, wiggle, and grab my nose without pain or discomfort... which isn't something you realize you will miss until it is taken from you! At 5.5 weeks, I managed to widen the gap in my ring enough to flip the jewellery up, if I want (Justin told us at the start that the rings are a bit bendy, and we could open or tighten them as desired, but our noses were way too tender to try right away).

clicker

Changing the Jewellery

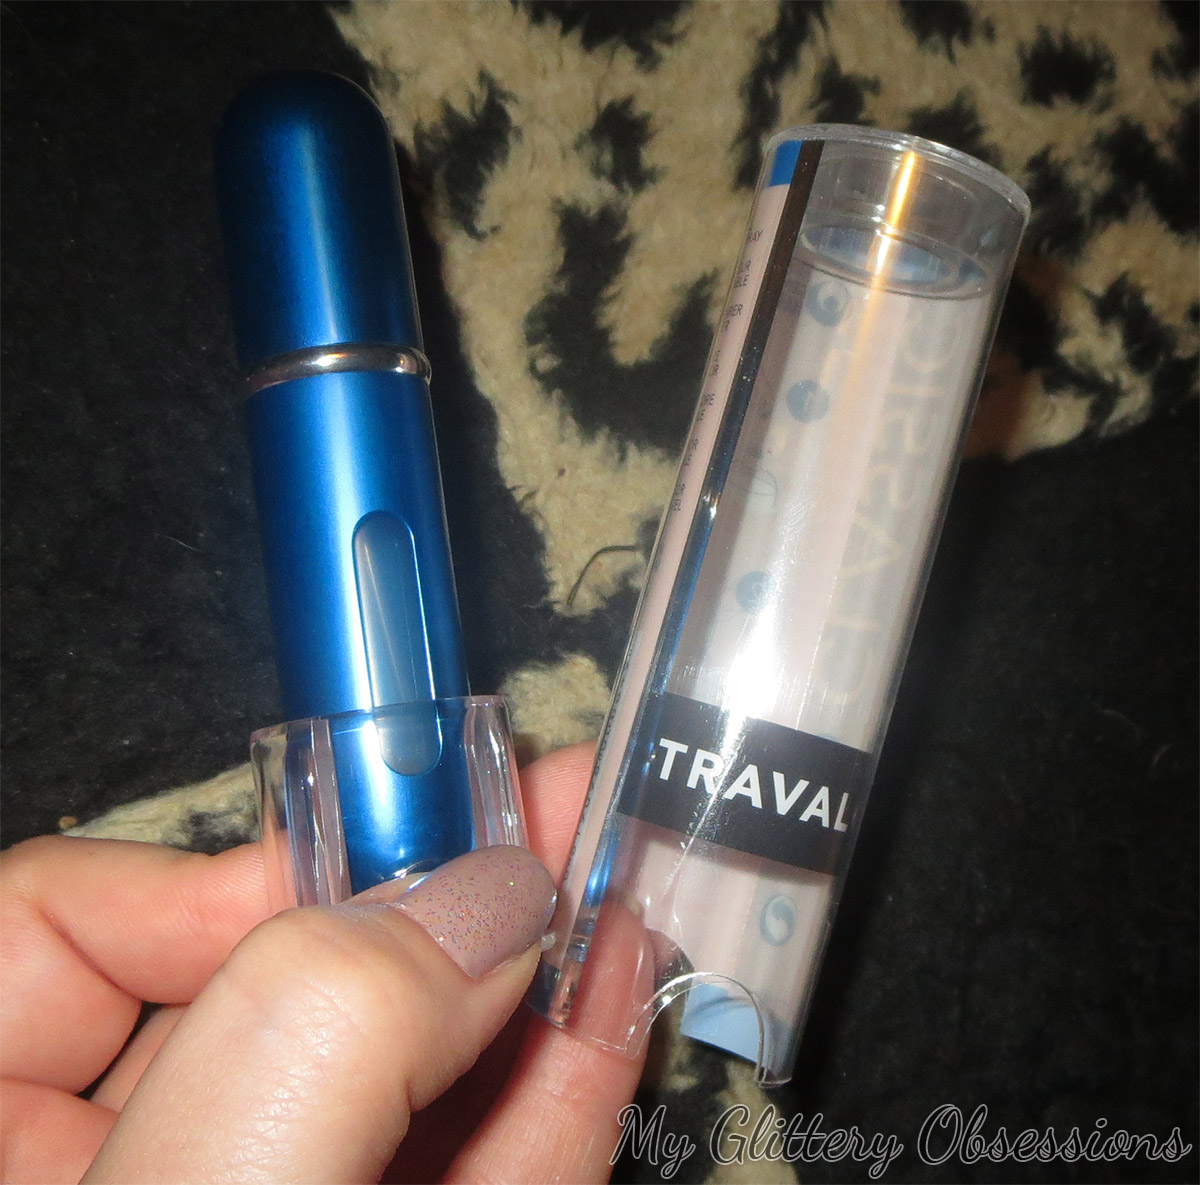
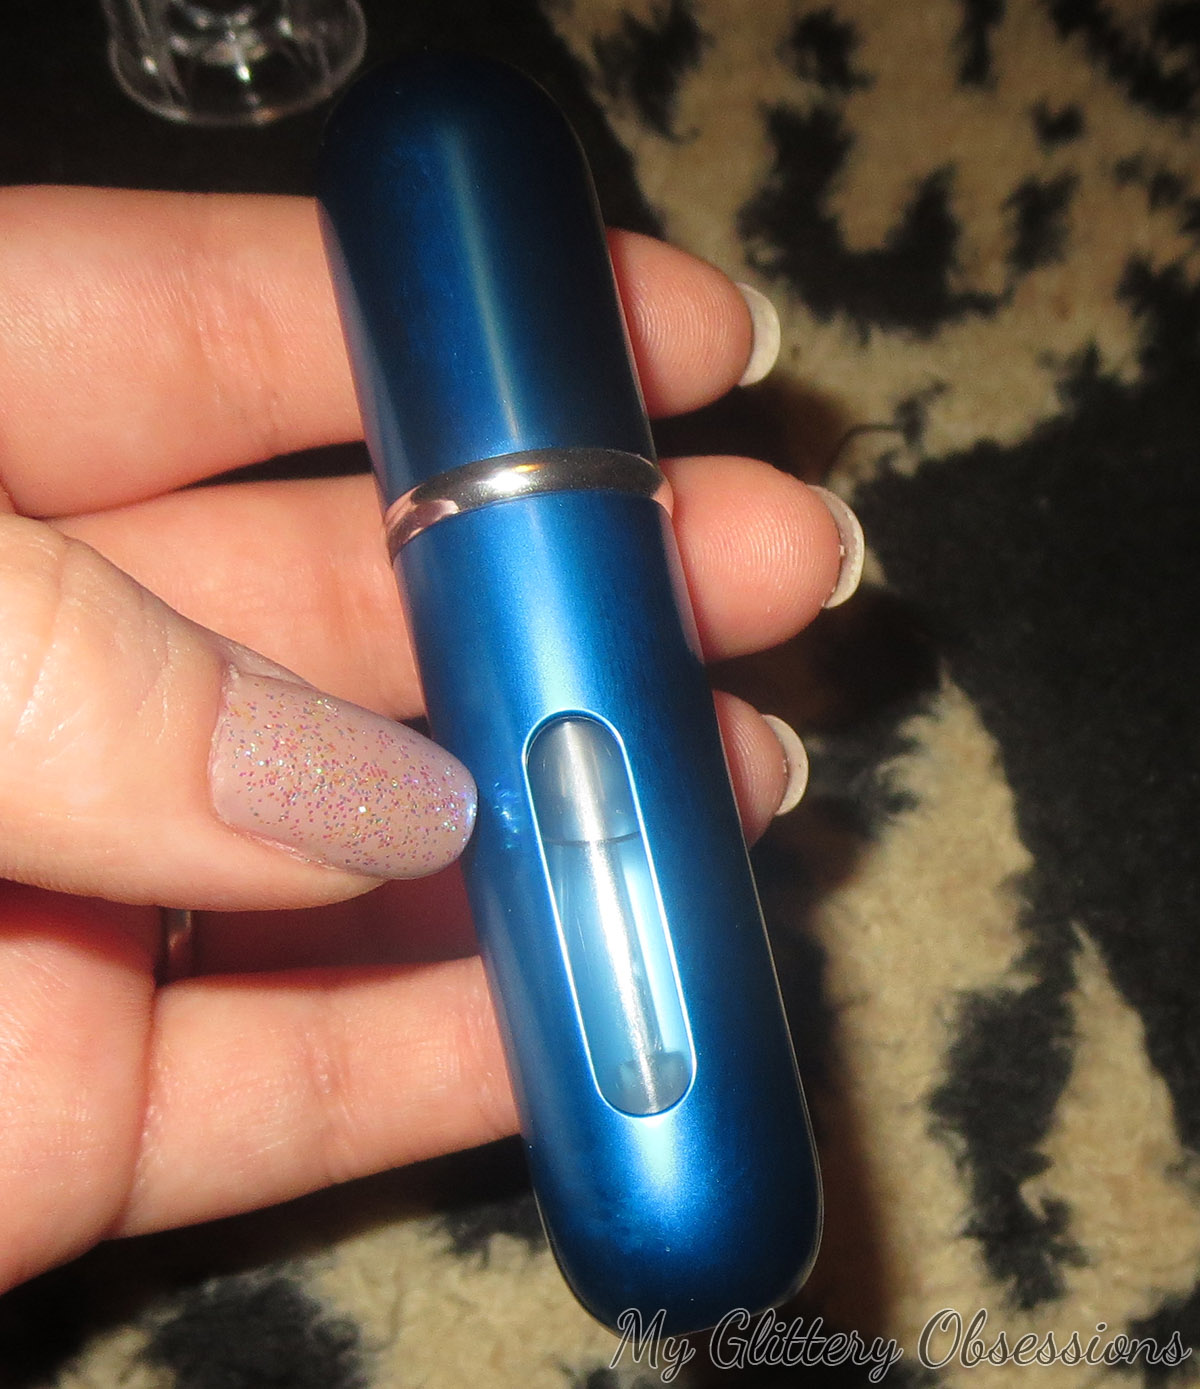
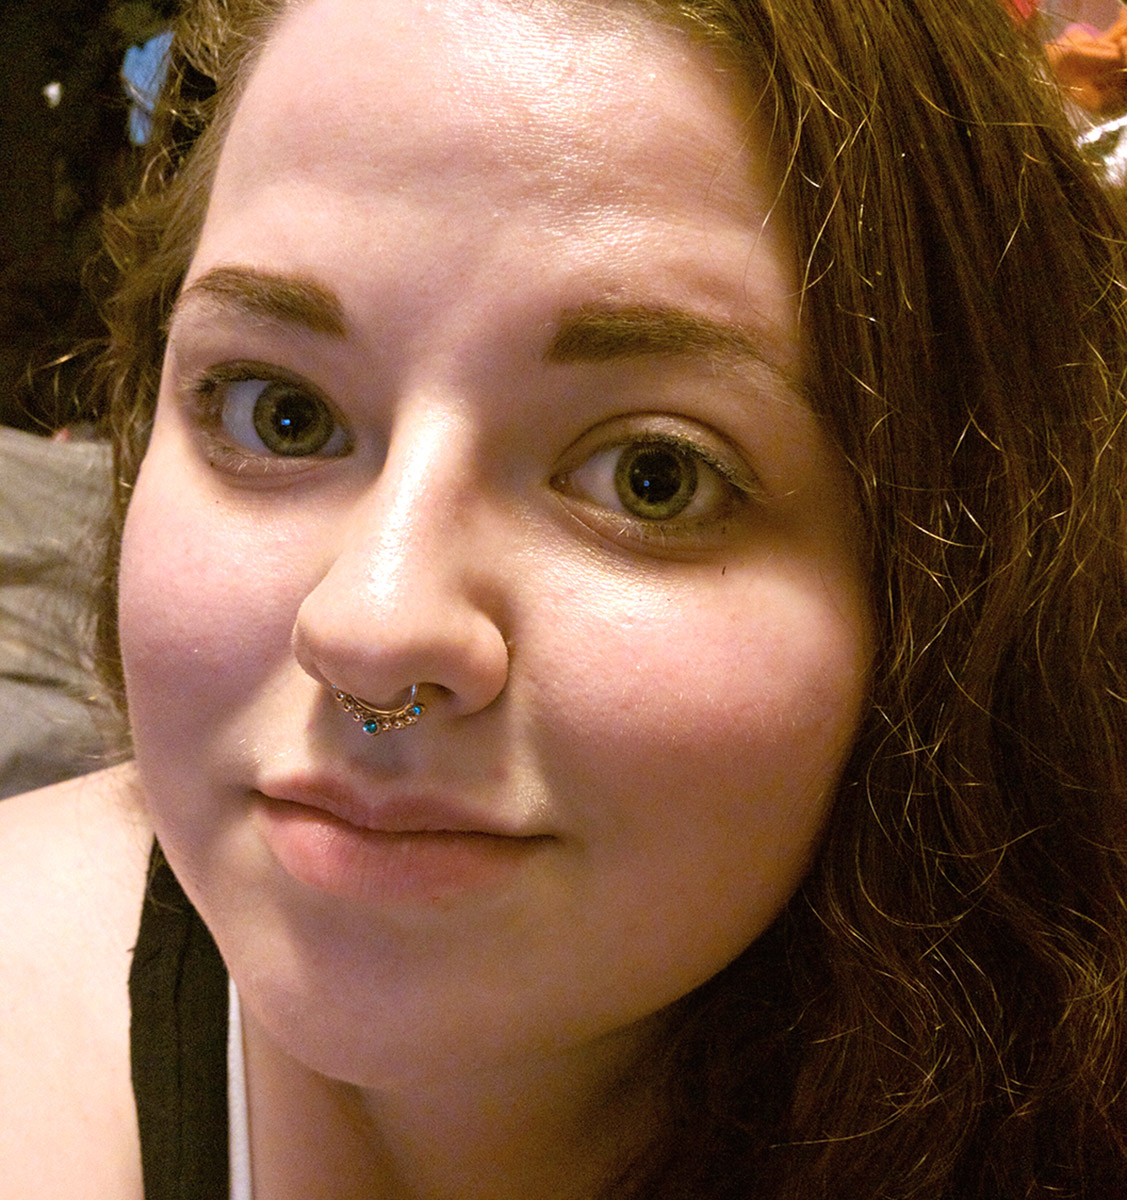
I waited the full 6 weeks before changing the jewellery for the first time, and I'm so glad I did, because it was harder than anticipated, and I did irritate my nose a little the first time. I had wanted to try my new clicker first (Seen above; Brit and I went and got new jewellery in advance of 6 weeks), but I just couldn't get the tricky bitch closed, so I ended up opting for a larger, rose gold circular barbell. (picture below).

These can be a little tough to get the balls screwed back on, but lucky for me, I wear the same rings as earrings (same gauge and everything), so I have practise and mostly do it thourgh feel. Brit had a slightly tougher time, but ultimately the barbells are the easiest jewellery to change in and out of that we've found thus far.

gold barbell

I know this is a pretty divisive piercing, as most piercings are, but I love it! Feel free to let me know in the comments if you have any questions about anything I said, or anything you think I missed. I'll be happy to answer any questions I can. If you are interested in piercings in general, I'd recommend checking out r/piercing on Reddit, as well. There's a large, active community there, and you can ask questions, look at other people's piercings, and share your own!

Thanks so much for reading. I hope you enjoyed this slightly different (possibly slightly off-topic) post!

Tuesday, September 6, 2016

Sunday, September 4, 2016

REVIEW || Palmer's "It Couple" Skin Therapy Cleansing Oil & Face Oil || + a Blog Birthday Giveaway =)

Hey guys! Welcome back to the blog. Today is a special day, because it is My Glittery Obsessions's 5th Birthday! That's right, I've been Keeping up this blog for the past 5 years, not always as proficiently or as regularly as I might hope, but it hasn't died yet, and that's always something to celebrate! So to celebrate, at the bottom of this review you will find a small giveaway: thanks to Palmer's, I'm giving away a prize pack featuring both the Skin Therapy Cleansing Oil FACE and Skin Therapy Oil FACE to three lucky winners! Rules and all the contest info will be down there. For now, let's get into the review.

***

I will state that the bottles in the pictures in today's post were sent to me by Palmer's for review, but this is not the first time I've used or even mentioned these products. I received a couple of Palmer's Skin Therapy oil products in a contest on someone else's blog, and have mentioned the face cleansing oil in my 2015 favourites post and my skincare routine video... so you know I already love that product! That said, as always, my opinions are 100% honest and my own, and not biased by the fact that I was sent these products for free.

The It Couple

Palmer's Skin Therapy Cleansing Oil FACE

This is one of my favourite face cleansers that I have ever used! It claims to be good for all skin types (dry, oily, sensitive, and aging), remove dirt and makeup, help regulate natural oil production and balance skin with great ingredients like grapeseed, jojoba, and rosehip oils, cocoa butter, and vitamin C. It's free of mineral oil, parabens, and pore-clogging ingredients, and only costs $8 at Walmart!

I don't love the scent, and would disagree that more sensitive people can use it... at least if you have a rose allergy, I would certainly stay away from this one. I know the scent bothers my mom, who is pretty allergic to rose fragrances, at least. I wish they would come out with a non-scented variety, if not better scents as well, as I really do love the product itself, and wish I could say I didn't have any complaints!

Other than that, though, it's great! It removes makeup super easily (just don't rub too much around the eyes, and don't open your eyes until you wash it off... it can sting the eyes a bit.) I usually just use a eye makeup remover first, so I'm not tempted to use this on my mascara! It doesn't stay greasy on the skin, it rinses clean and fresh, and my skin always feels great, so clean but not tight or dry!

I know any oil can be scary to oily-skin peeps, but honestly, it really does help to balance. When you wash and moisturize with good oils for your skin, instead of drying your skin out with harsh, astringent products, your skin feels more balanced and is less likely to try to overcompensate and produce excess oils itself! And it's pretty much a no-brainer that oils are great for dry skin! I really do recommend this cleanser to anyone interested in cleansing oils, because I love it and it's so affordable. Plus, it's great for the colder months coming up when our skins often need even more moisture.

Palmer's Skin Therapy Oil FACE

Face Oil

While I admit that I can't love this moisturizer as much as it's face cleansing sister, it is still great! I don't often use intensive moisturizers, because my skin has pretty good balance, except when it's being oily. But this is still a nice skin treat, especially in the colder months.

This moisturizing oil contains even more great for your skin oils than the cleanser, such as: sweet almond oil, sesame oil, coconut oil, macadamia oil, apricot oil, grapeseed oil, camelina oil, sunflower oil, rosehip oil, and argan oil. It's packs a very moisturizing and powerful punch, plus it also has vitamins C and E and cocoa butter.

I'm not sure I'd recommend this stuff to someone with oily skin, but it could probably be used in small quantities, or mixed in small doses into your regular moisturizer as a treat. It is meant to be great for anti-aging, though, and would be great for dry skin as well. Also, just because it's super hydrating doesn't mean it's heavy! It absorbs into the skin quite quickly and doesn't leave a weird, heavy film on top. Just make sure to use sparingly... you can always add more if your skin is dry, but it is going to be very hard to take it off if you use too much! I small drop or two is usually good for my whole face! This product retails for $10 at Walmart.

***

The Giveaway:

So if you want to win these two great products and try them for yourself, you may be in luck! All you have to do is complete the tasks in the rafflecopter form below.

Unfortunately, as Palmer's is sending out the prizes, I can only open this up to Canadian residents. Also, make sure you have permission to enter if you aren't of legal age, as you will need to provide me and Palmer's your home address to get your prize!

The only mandatory entry requirement is to leave a comment with a suggestion for a future blog post or video, but if you follow me on twitter, instagram, youtube, or bloglovin' you can get extra entries, and you care share the giveaway tweet once a day for even more entries!

The giveaway closes September 17th at 12 am, and I will pick three winners who will have 48 hours to reply. If you don't reply, I'll choose a new winner.

NO GIVEAWAY ACCOUNTS PLEASE!! I want this prize to go to followers, not just someone who enters all the giveaways. I will be checking.

a Rafflecopter giveaway

Thanks for reading and Good luck! =)

Friday, September 2, 2016

REVIEW + SWATCHES || NYX Strobe of Genius Illuminating Palette

In which I briefly share my thoughts on and swatch the new NYX Strobe of Genius Illuminating palette. Spoilers: its gorgeous! See below the embedded video player for up close pictures of the palette, and my hand swatches.

Click here to watch in HD, or watch below:

The palette:

NYX Strobe of Genius Palette

The highlighters:

NYX Strobe of Genius colours

Swatches:

NYX Strobe of Genius swatches

Thanks for watching!

LinkWithin

Related Posts Plugin for WordPress, Blogger...