Showing posts with label face of the day. Show all posts

Tuesday, September 13, 2016

TUTORIAL || Warm Fall Eyes || Ft. BH Cosmetics Shaaanxo Palette + Kiss Lashes

A photo posted by Kristy (@glitterocd) on

Hi guys! I posted the above picture of a really gorgeous red/orange-y, fall leaves type look on instagram just over a week ago, and loved it so much I wanted to recreate the look for you in a tutorial! Also, I attempt the impossible (for me) and use some pretty, fluttery lashes from Kiss. Hope you enjoy!

Click here to watch in HD, or watch below:

And ny the way, this is the picture I was taking at the end of the video:

A photo posted by Kristy (@glitterocd) on

Don't forget about my Palmer's Skin Therapy giveaway! It closes in just a couple of days, so click here to enter!

Thanks for watching!

Monday, March 30, 2015

|| Classic Pin Up Makeup Tutorial || {video}

Quick and easy tutorial on how to accomplish that perfect, classic red lip and cat eye makeup look! Perfect for everyday, dressing up, 50's costumes, or trying to be Taylor Swift! Or Kat Von D, honestly. Works on everyone, for every style.

Click here to watch in HD, or watch below:

Thanks for watching!

Monday, March 23, 2015

|| Galaxy (Tights) Inspired Makeup || GRWM! || {video}

If you've seen Black Milk leggings, either on my instagram or otherwise, then you know how awesome they are. If not, you should google that shit. They're pretty awesome. I show you a close up of mine in the start of the video, too, if you're too lazy for googling. Anyways, this is just a quick GRWM of a look inspired by my galaxy tights! Enjoy!

Click here to watch in HD, or watch below:

Thanks for watching!

P.s. Just wanted to let you know that the winner was chosen for my Aveeno giveaway, and the prize has been shipped out. Thanks to everyone who participated!

a Rafflecopter giveaway

Monday, March 16, 2015

|| Soft Spring Makeup Tutorial w/ Orangey-Red Lips || {video}

Click here to watch in HD, or watch below:

I think I'm going to try to do this when I can, but here are some more pictures of the makeup look. And also a look into just how many pictures I take when trying to take title-card pictures! (if I've done it right, you should be able to clikc on any image below to view the full-size!)

Thanks for watching!

Monday, November 10, 2014

Monday, March 10, 2014

Naked 3 & Dark Lips GRWM Video

Just to make sure you all know it’s up, I wanted to post quickly and link you all to my latest video. If you aren’t subscribed yet, make sure you do to be updated whenever I post a video. You can also find out about new videos by following me on Twitter, Google+, Facebook, or Instagram, all of which are linked in the “Contact Me” tab above!

I’ve embedded the video below, but you can also click here to watch in HD on Youtube!

Also, it took me a while to notice that my link and embedded video for my February Favourites was incorrect before, but they have been fixed now, so if you missed that, you should try again if you’re still interested (here’s the link again)!

Thanks for watching! I’d love to hear your comments or suggestions!

Saturday, December 21, 2013

Christmas Makeup Tutorial/Inspiration

With only a couple more days until Christmas (3, to be exact), I thought it would be fun to do a festive, Christmas-y makeup look. I don’t have step-by-step pictures for you, but this look is very simple to recreate, and I will give you a list of the products I used, and a quick description!

To start off, here’s the look:

100_3390

Sorry this first one is so washed out… For some reason the camera decided my skin was pure white for this shot! I swear the rest will be better…

100_3408

100_3393

100_3401

And a close up of the eye makeup:

100_3391

Obviously, if you have similar colours, you can use whatever products you have at hand, but here’s what I used:

Lancome Color Ideal Foundation:

100_3410

I honestly don’t think they make this foundation anymore, but I still have this and its still fine, especially since it has a pump so my fingers have never been in it. Anyways, I used this with my flat-top Real Techniques Buffing Brush in a thin coat all over my face. Followed by:

Maybelline Instant Age Rewind Concealer in Fair:

100_3411

Under my eyes and in a triangle on either side of my nose to highlight the center of my face. I don’t have much in the way of dark circles, but this helps my makeup to look more flawless, and I feel like it—and the powder of top of it—help to keep my eyeliner in place. Next, I used my:

Rimmel Stay Matte Pressed Powder in Sandstorm:

100_3416

Over my foundation and concealer to set and mattify everything, and to make sure it says in place all day. Next, I took my

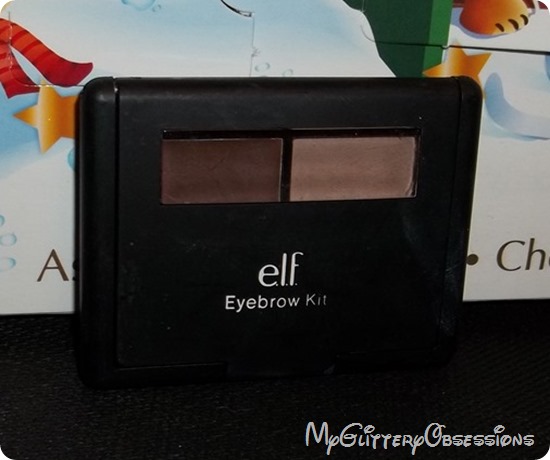
ELF Eyebrow Kit in Light:
100_3415

I used an Angled liner brush from Morphe with the gel side first to shape and darken my brows, followed by the powder to set the gel and fill in sparse areas. I like to do my brows first because then I don’t over do it on my eyes, and that way I don’t forget. After that, I used my:

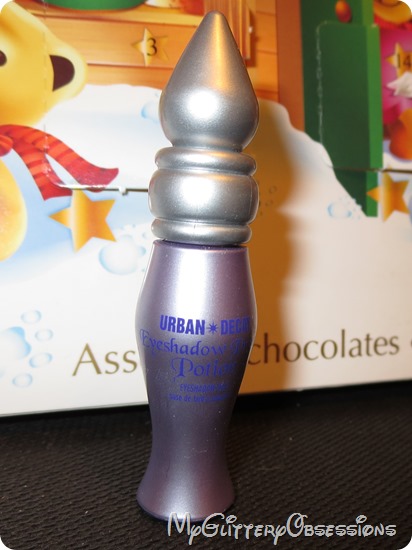
Urban Decay Primer Potion:
IMG_0089

To prime my eyes to make sure my makeup lasted, of course. Then I topped the primer with:

Urban Decay eyeshadow in W.O.S. (from the Naked Basics palette):

IMG_0047

IMG_0048

You haven’t seen the Naked Basics palette on my blog yet, I don’t think, but you will soon. Anyways, I just wanted to use a shadow that was basically the same colour as my skin to make sure my eyelids looked matte, clean, and bright, since I have thin eyelids. Also, I find that my eyelids are just oily enough to make my eyeliner transfer if I don’t wear it over eyeshadow, so this helped with that as well. Next, I used:

Wet’n’Wild H2O Proof Liquid Liner in Black:

IMG_0093

To line my upper lash line and to create a wing, followed by:

Annabelle Glitterama Liquid Liner in Neon Green:

IMG_0094

After drawing on the wing in the black liner, I traced just above that line with the green glitter liner. I had to do 2 thin coats to make it look this glittery and bright, but I really love how it came out. Next, of course, I added:

Urban Decay 24/7 Liner Pencil in Zero:

IMG_0086

To line my lower waterline. (If you find that liner in your water line tends to slide from the outer corners down into weird smudges, like mine loves to do, I would suggest using an angled brush and a matte black eyeshadow and press that into the edge of your liner, just below your lower lashes. I find that helps to prevent some of the smudging, if not all, and keeps my makeup looking cleaner, longer.) And to finish up my eyes, I added:

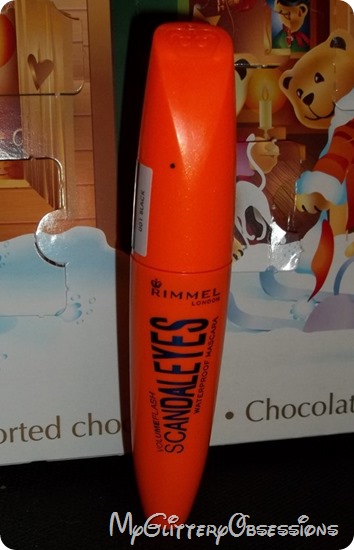
Rimmel Scandaleyes Waterproof Mascara in Black:
100_3417

To make sure I had eyelashes! I used about three coats of this mascara, since I find it goes on fairly thin. The upside of this formula is that I don’t find it really ever creates clumps, even after three coats. But the downside is that I have to do three coats to make my lashes look how I want them to. I’m pretty meh on this mascara. I don’t hate it by a long shot, but I wouldn’t choose it again.

If you wanted even more drama, you could definitely add some falsies, but for this look I stuck to just the mascara.

Now that the eyes are done, there are just two more steps to this look:

MAC Mineralize Skinfinish in Soft And Gentle:

100_3424

I used my Morphe fan brush and swiped this along the tops of my cheekbones, the bridge of my nose, my cupid’s bow, and just under my eyebrows. I love this highlight, but if you use it, make sure to use the tiniest amount, since it is insanely shimmery! I just swipe my brush into the product lightly, tap it off, and that is more than enough for me to highlight everywhere I want to do so!

Finally to finish off my look I added:

Sephora Lip Attitude Lipstick in Chic:

IMG_0100

Green and red is such a Christmassy combination, so to complete this look I figured a classic red lip was in order. This is my favourite red lipstick, but I’m not sure if it’s still available. It’s Sephora’s own brand, and the colour is Chic… unless it’s C27. Either way it’s gorgeous and I love it, but any classic-red lipstick will do!

And that’s all! Spritz with a makeup setting spray to make sure it lasts all day long (I use Urban Decay’s All-Nighter), and you’re good to go.

***

This look is really simple, so I think it would be good for just about anywhere that you might want to wear it! You could also, substitute the green liner for gold or silver glitter for a slightly different look, but I really love the green and red together, since it looks so subtly Christmassy. Or maybe it’s not that subtle. *shrugs* I wore this out shopping at the mall today, but I think it would also be great for Christmas parties, Christmas dinner, or maybe even as a simple New Year’s Eve look!

Anyway, I hope you liked this or took some kind of inspiration from it for yourself.

Thanks for reading, and Merry Christmas!

Sunday, November 3, 2013

Four Year Anniversary Makeup (+ my new Michael Kors bag)!

Hello again! I thought today I’d post a quick look at how I did my makeup for my fourth anniversary date with my boyfriend, as well as the fantastic MK bag that he bought me as an anniversary gift!

For makeup I went pretty simple, considering my makeup the next day was going to be pretty intense… (Our anniversary is the day before Halloween!).

I used my Skin 79 BB Cream and set it with my Rimmel Stay Matte powder. I also used my Too Faced Milk Chocolate Soliel bronzer to lightly contour my face, and used my MAC Soft and Gentle as a highlight on my cheekbones, nose, and cupid’s bow.

2013-10-30 13.55.39

For my eyes, I used my Maybelline Colour Tattoo in Bad to the Bronze as a light wash across my lids, and highlighted the inner corner and brow bone with Virgin from my UD Naked palette. I lined the top lashes with my Wet’n’Wild H20 proof liquid liner, and the waterline with my UD pencil in Perversion. For mascara, I used two coats of my Revlon Lash Potion. Finally, for my brows, I used my NYX AUTO eyebrow pencil in Taupe.

2013-10-30 13.56.37

Sorry for the over-exposure of these next two images, but they were the only non-blurry ones I got of my full face with my lip colour! I’ve tried to colour-correct them a bit, and this is the best I’ve managed.

Anyways, for my lips, I used my NYX Soft Matte Lip Creme in Addis Ababa, which I absolutely love not just for the colour, but also because it sets quickly, lasts a long time, and fades nicely (at least in my experience). I’d love to try more colours of this product.

2013-10-30 14.05.33
2013-10-30 14.06.41

One thing I’ve started to notice about my makeup, or at least the looks I love enough to take pictures of, is that I’m developing my own “classic” sort of look, which pretty much always includes a bronze or gold eye, flawless skin, perfect brows, contouring, and a bright pink-ish lip! =P

And now for my present:

2013-10-17 18.58.54

I actually got this bag about a week before our anniversary, when my boyfriend and I were going downtown, and he said we should stop in at the Michael Kors store to visit the bag I have been lusting after ever since the day my best friend bought hers. I wasn’t sure they still made it, since it isn’t on the site. I had a tiny suspicion that I might get the bag, but I didn’t want to believe that in case I didn’t… I mean, it’s a very expensive bag, in my opinion, at about $250 bucks! But when I tried to put it back after trying it on he stopped me and I got the beautiful bag!

2013-10-17 19.05.49

It’s called the Jet Set Zip-Top tote… so it doesn’t have a cool name or anything, but who cares?! I love it so much, I think it’s so simple and beautiful… and the leather is sooo soft! Also, unlike lots of designed purses, it has lots of pockets inside, and even a clip for your keys so they don’t get lost at the bottom!

2013-10-17 19.06.31

2013-10-17 19.06.53

2013-10-17 19.07.16

So yeah, I’m super excited to have it, even like 2 weeks later. I’m actually probably much too excited about this considering its just a bag… but that’s alright.

Anyways, thanks for reading!

Sunday, October 27, 2013

Test-Running my Halloween Makeup!

I’m doing a rainbow-y version of Cyberpunk for halloween (just google Cyberpunk Fashion if you don’t know what I mean), so I wanted to make sure that what I had pictured in my head would be a possibility before the day dawned. Here’s a quick look at the various parts of my makeup for this Halloween!

Rainbow eyes. Sorry for the blur on the first picture:

2013-10-26 23.10.28

Looks much cooler once you get the black liner and mascara on to make the colours pop:

2013-10-26 23.13.33

These eyes are really easy if you already have the makeup necessary. I used my BH Cosmetics palette colours over my Nyx Milk pencil. Then I used my brushes to pat on the colour stripes. I didn’t even blend the colours together, just overlapped them slightly, and I really love the look. If you wanted, obviously you could blend the edges and make this more of a gradient and less of a harsh rainbow!

And then, neon pink brows:

2013-10-27 01.02.23

2013-10-26 23.23.14

2013-10-26 23.58.48

The brows are another thing that I think look more impressive than they are. All you need to do is use the Milk pencil like on the eyes, fill in your brows with the white. Then, I used a slanted liner brush to smooth the white into the hairs, cleaned the brush, and used a hot pink shadow and patted it onto the base until I liked the saturation. This is really easy to do with any colour you want, though a matte shadow will work better than a shimmer.

And finally, my lips:

2013-10-26 23.58.13

2013-10-26 23.58.48

I was just planning to use my MAC Hang-up for the look, but it didn’t seem dark enough. So what I did was I used my Nyx jumbo eye pencil in Black Bean (I think), lined the outter edge, and used a lip brush to smudge the colour towards the center of my lips for a slight gradient effect. Then, I redefined the outer edges with a black eyeliner pencil. These look a little rough and patchy, but as I wore the look, the colours ended up blending together and looking cooler.

And finally, here’s the makeup with my rainbow wig:

2013-10-27 00.34.45

I’ll most likely make sure to post my costume pictures here either a little before or after Halloween. If I don’t post before then, I hope you all have a fantastic time at whatever you plan to do on Halloween, be it parties, clubbing, or sitting home with your cat and some pizza! I suggest putting on a costume no matter what you’re doing, though! =P

Thanks for reading!

Sunday, August 25, 2013

B2S 2: Back to School Makeup–Fresh and Natural

Hello again. You may be confused by the title, and wondering why you can’t find B2S 1, if this post is #2, which is honestly fair enough. That post is up on my other blog—Thought-Constellations—and you can find it by clicking right here.

If I had the lighting in my house, I would have liked to have done this post as a video for you, since video tutorials are much more helpful. As it is, I guess these types of posts (I’m planning to do a couple more after this one) will be more of a look inspiration post, just to give you ideas of what sort of products you could use and what type of looks you could make.

The idea for today’s makeup look was meant to look simple and somewhat natural, while still pretty and more pulled-together than no makeup. Here’s what I used to achieve my look:

100_3164

Garnier BB Creme in Light/Medium:

100_3194

This is an optional step, especially in a natural look, but it does give extra coverage if you need or want that, especially when layered with a coloured—rather than a translucent—powder. For more coverage, you could used a light foundation; one I would suggest is Revlon’s Nearly Naked.

Clinique Acne Solutions Concealer:

100_3191

If you need a concealer to cover zits and pimples, like I do at the moment, then I would suggest using one that fights your acne while it’s covering it. This is the one I use, and I quite like it. It doesn’t do as much as my regular zit gel for clearing up the issue, but it doesn’t make the problem worse like other concealers, and it covers well.

Rimmel Stay Matte Powder in Silky Beige:

100_3198

Even if you don’t want to use a foundation or BB cream, you should use a powder that matches your skin in order to help even out your complexion and help mattify some shine. This is my favourite one.

Benefit Coralista Blush:

100_3165

This is my favourite blush, and I think it gives a really natural glow, as well as some colour, to your face. I love the coral more than a pink, because it almost doubles as a highlighter, and with the pretty gold shimmer, it also helps to highlight the face. If you want to try this, but don’t have the money, ELF has one in their Studio line called “Candid Coral” which is identical and only $3.

Nyx Eyebrow Pencil in Taupe:

100_3189

While not essential, filling in your eyebrows helps to pull the look together and ultimately makes you look a lot more polished. There are tons of alternatives to a pencil, if pencils and you don’t get along, such as brow powders, gels, waxes, etc. At the very least, I would suggest shaping your brows and cleaning up any stray hairs, or going to get them done professionally.

Essence I <3 Stage Eye Primer:

100_3183

If you use the next product that I am as well, you don’t really need an eye primer, as the Maybelline Colour tattoos aren’t going anywhere, but if you use any other shadow, especially a powder shadow, then a base helps to cover up any imperfections on you eyelid and really pumps up the pigmentation of your shadows, as well as increasing their longevity.

Maybelline Colour Tattoo in Bad to the Bronze:

100_3182

These are kind of a miracle product. I can’t believe I waited to try them. I only have this one, but it’s wonderful. It’s super easy to apply, very buildable, very easy to sheer out… very versatile, really. It’s great on it’s own or layered under powder shadows as a base. I’m in love and want more.

For this look, I started on the outside corners of my eyes to put the most pigmentation there, and then sheered it out towards the inner corners.

Covergirl EyeEnhancers Shadow in Champagne:

100_3171

After applying the Colour Tattoo, I used this shadow just as a highlight around my tearduct on both the upper and lower lash line.

Urban Decay 24/7 Liner Pencil in Perversion:

100_3177

I used a black liner just on my waterline. This is definitely optional, but I love how it helps to define my eyes. Another option would be to use a white or skintone coloured pencil, and just make sure to apply mascara to your bottom lashes. This would open up your eye more and help you look more awake.

Revlon Lash Potion Mascara in Blackest Black:

100_3175

Finally, you need to finish the look with some mascara. I’m wearing about two coats of this one for this look. This mascara isn’t phenomenal, but it is a pretty good, basic mascara. If you don’t like a lot of volume or length, and just want something simple, I would recommend this one.

Maybelline Baby Lips in Pink Punch:

100_3169

Although I’m not wearing it in the picture below, I’m including this because it seems wrong to call a look finished when you aven’t mentioned the lips. This would be a good choice for a natural look because it just gives a bright but sheer wash of pink to the lips, and it’s also very hydrating and contains SPF 20.

The finished look:

100_3161

This look is great because it’s shimmery and pretty, but not overdone. Also, since the eye shadow is so long-lasting, this would be a great base to work off if you needed a look to go from day to night. Just add some liquid liner and a wing on top, another coat of mascara, and a bright or red lipstick. And maybe some bronzer to contour.

Thanks for reading! Make sure to check out my other Back to School posts!

***

Other posts in this series:


LinkWithin

Related Posts Plugin for WordPress, Blogger...