Showing posts with label Eyebrows. Show all posts

Saturday, August 6, 2016

REVIEW || Paula's Choice Makeup Products

Hi guys! Today I have another review for you, this time of a few of the products from the Paula's Choice makeup range. You may or may not remember I was sent a couple skincare products a while ago to review, and when they asked if there was anything else from the brand I wanted to test, I took a look at their site and saw they also make makeup! I had never heard anyone else talking about any of their makeup, and since I love makeup more than skincare anyways, I requested they send me a few things to review... and here I am finally getting around to reviewing some of those Paula's Choice makeup items!

As always, all the opinions expressed on this blog are my own and 100% honest. I was sent these products for review, but was not paid to write this post. =)

Paula's Choice is first-and-foremost a skincare brand, so it follows that most (if not all) of their makeup products have a skincare side to them. The glosses are anti-aging and have an SPF, for example, and there are some pretty nice ingredients in many of the products, so I was looking forward to giving them a go! I received a brow kit, mascara, set of chubby lip pencils, lip glosses, a makeup remover, and a sunless tanner. The only thing I haven't tried is the sunless tanner because I just don't tan... I almost gave this one a go, because it was a concentrate you just pump into your favourite moisturizer to apply... but it's just so not my thing. Sorry.

And now I guess we should get into my thoughts!

Brow Defining Cream Duo
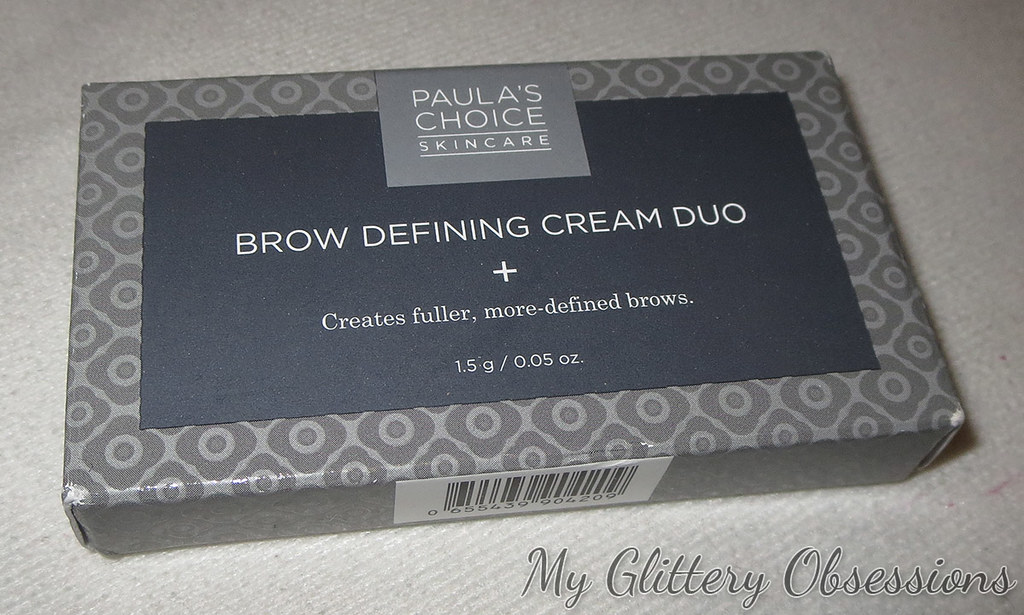
Brow kit box

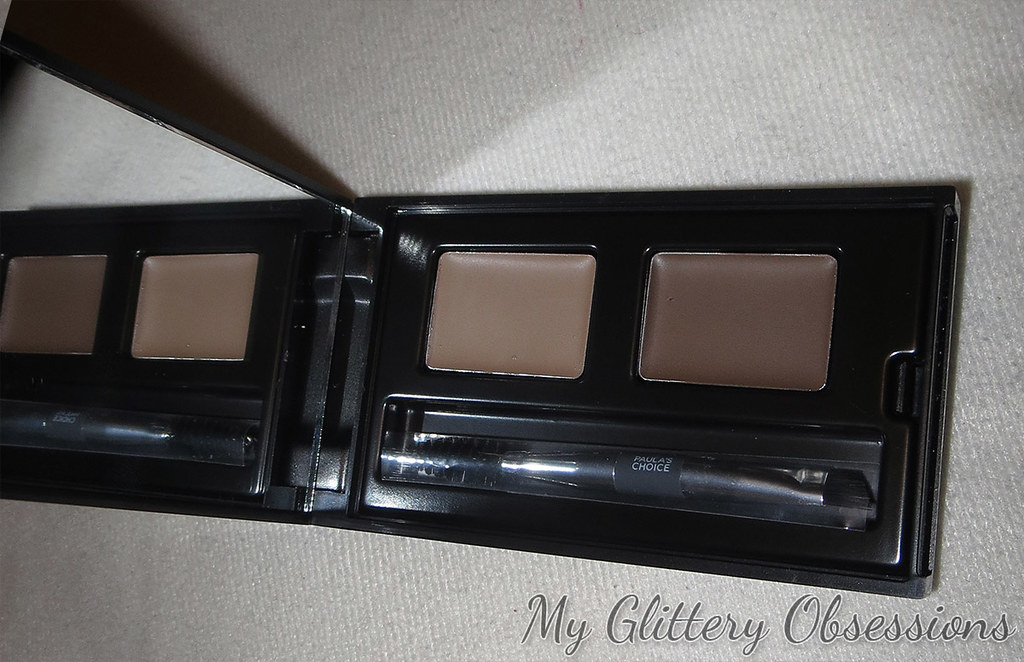
First, the brow kit. Brows are so important, and one of my 2 most basic makeup needs! This kit comes in a compact with a pretty nice mirror, two coloured brow creams, and a double-ended brush with a spoolie on one end, and an angled brush on the other. The kit retails for $20 USD on the Paula's Choice website.
brow kit closed
brow kit inside

I think this kit comes in only the one shade, and personally I found that the dark colour is very dark, but the light is too light (it's very blonde). So how I found works best for me is to use the dark shade to define the lower line of my brows, and the tail, and then I work the lighter colour into the front and tops of my brows, and that works pretty well. Someone with darker or lighter hair/brows than me might find themselves only able to work with one shade or the other.
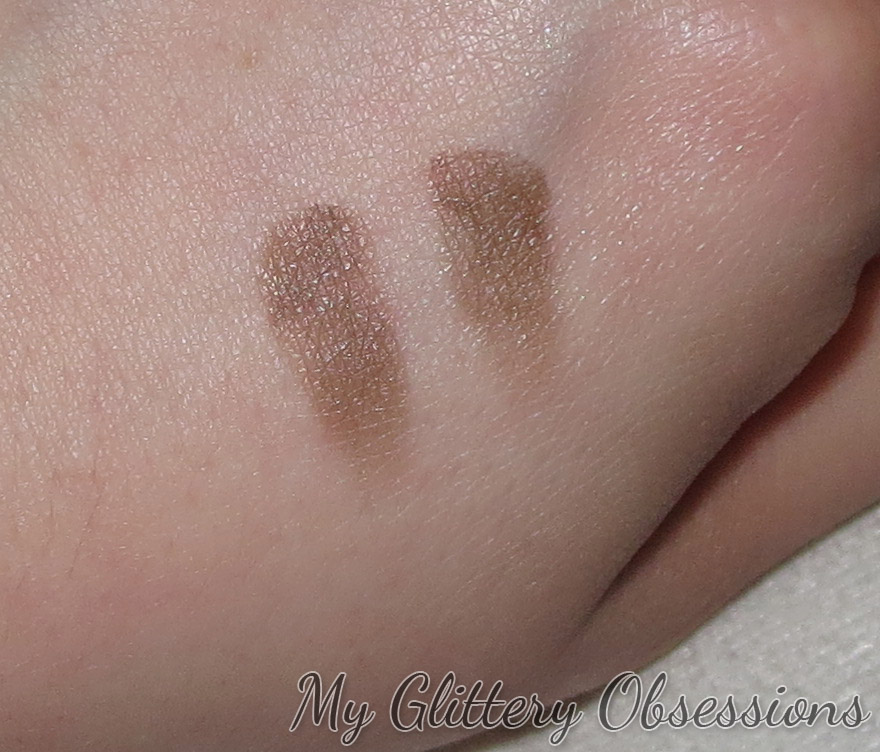
brow kit swatches

As for consistency, these are creams, not gels, which means they aren't sticky but also don't offer any hold, so I like to pair this product with a brow gel. The brush itself is a pretty good mix of soft and firm, and worked well enough for me, and I love that it includes a spoolie to help shape and blend! All in all? It's a good product, but not amazing. But I do prefer pencils most of the time, so this may be better for another type of person. Also, I didn't find it had amazing staying power, or ever really set fully, unfortunately.

Resist Anti-Aging Lip Glosses
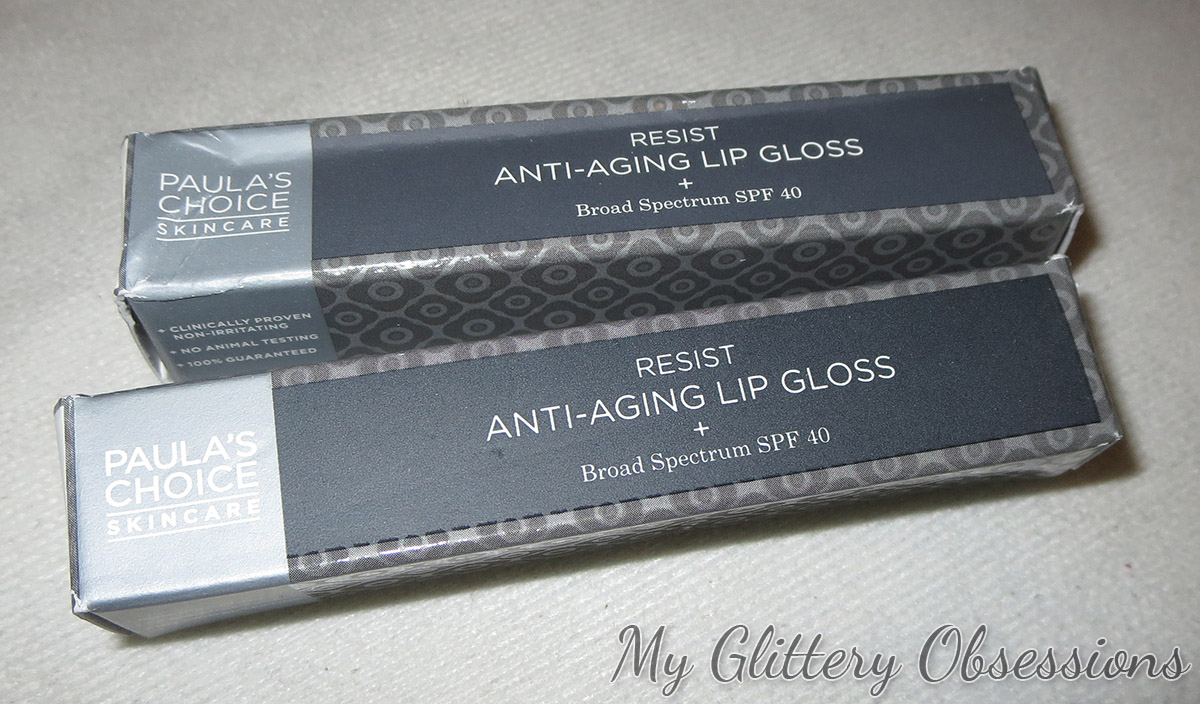
Lip gloss boxes

As I mentioned above, these glosses don't just make your lips glossy, they're meant to protect your lips with an SPF of 40, and contain anti-aging ingredients to hydrate, protect, and smooth your lips. They retail for $18 USD on the Paula's Choice website.
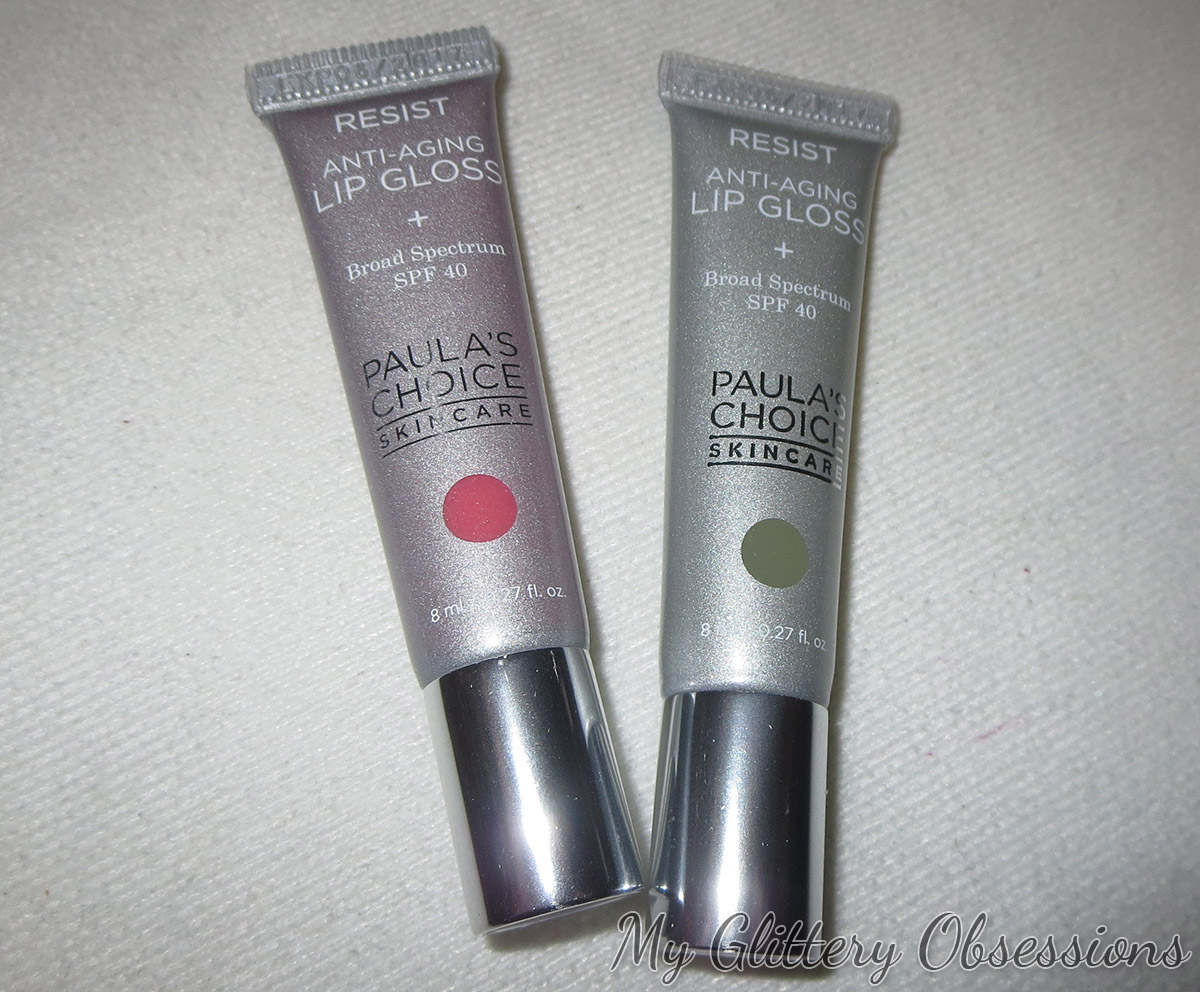
lip glosses

These glosses come in plastic squeeze tubes with a narrow angled plastic applicator tip, which isn't great for precision, but these are a sheer gloss, so precision isn't a huge deal. Personally, I found these smell like the maple icing on a Tim Horton's maple glazed donut, but not too strongly. It's mostly a sugary smell that mostly manages to disguise the sunscreen scent, and they have not discernable flavour (aside from a slight sunscreen-iness).
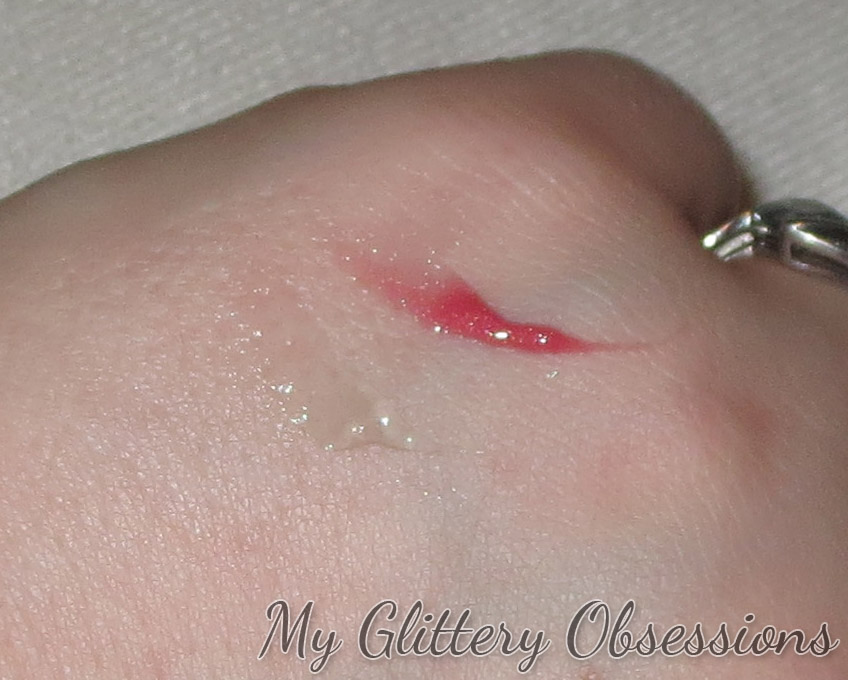
Lip Gloss swatches

These come on two colours: pink and clear. I did find them slightly sticky, but not horribly. While these aren't my thing (as a non-lipgloss lover!), they could be a good option for gloss-wearers as a simple summer lip product when you want protection and a little more shine or colour than your average SPF balm. Also, I suppose you could use the clear as an SPF 40 lipstick topper!

Berry & Bright Lip Collection
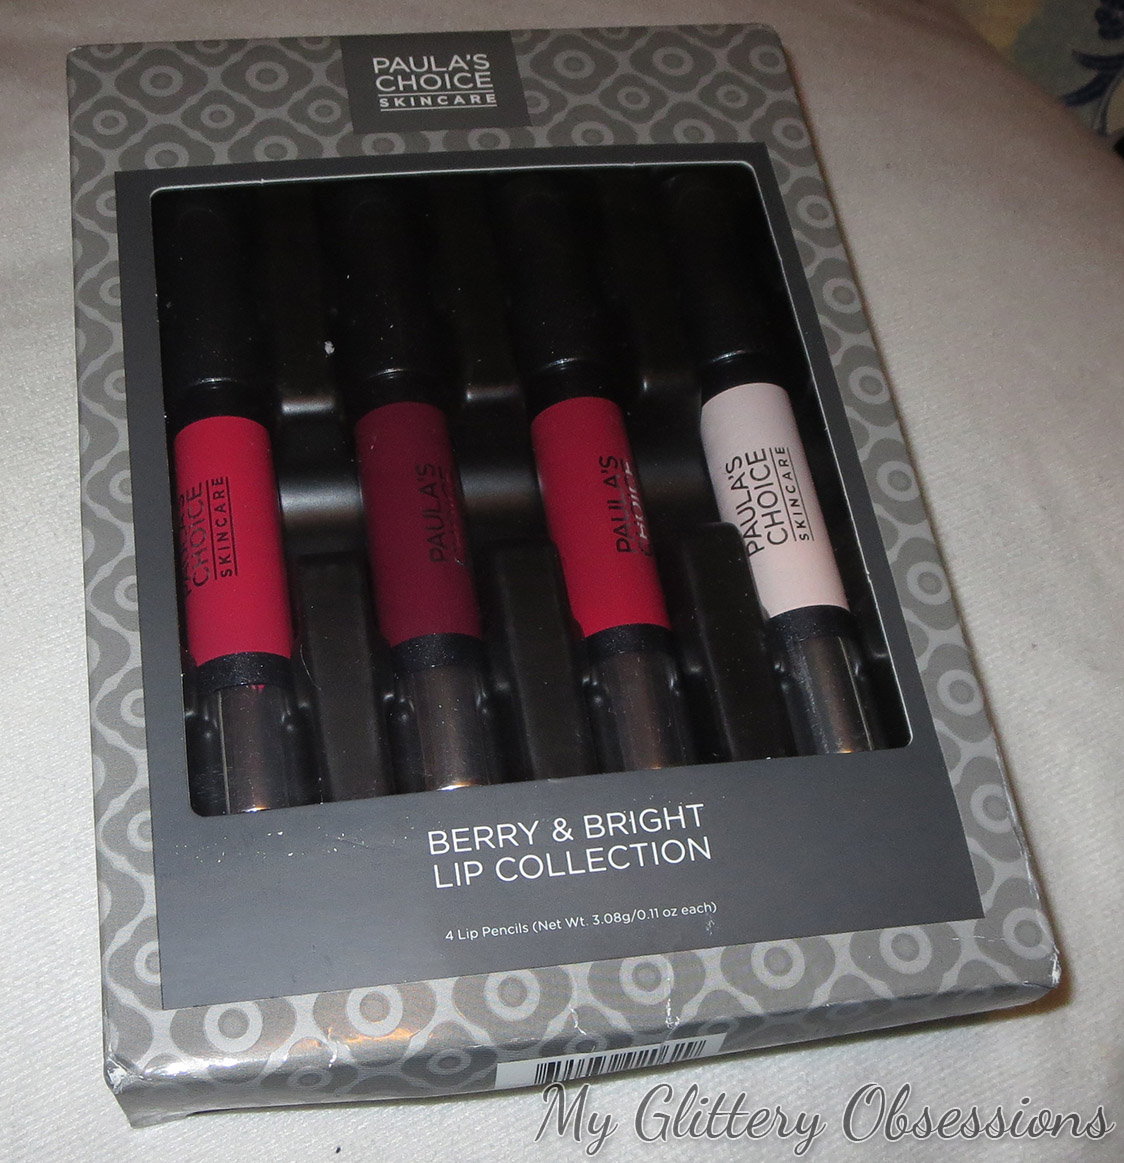
Lip Sticks in box

This set contains four chubby lip pencils, three of which are bright or berry colours (as the name would suggest), and the fourth is a shimmery topper. From the looks of things, these are no longer available, and were a Holiday 2015 release. The Paula's Choice website actually does not currently sell any lipcolour products, aside from the pink gloss I showed above. I'm not sure there's much point in reviewing them now, but I will say they were quite nice, if not spectacular. Not sure these will ever come out again, but if they do, I'll pop my swatch picture up and move onto the next product. (these were $45 USD).
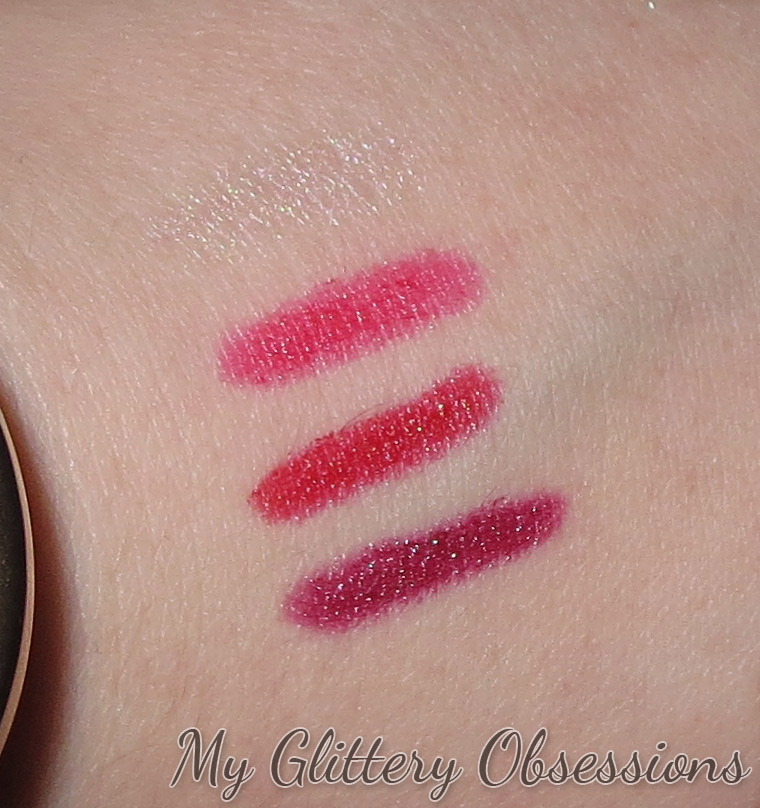
Lipstick swatches

Fantastic Lash Mascara

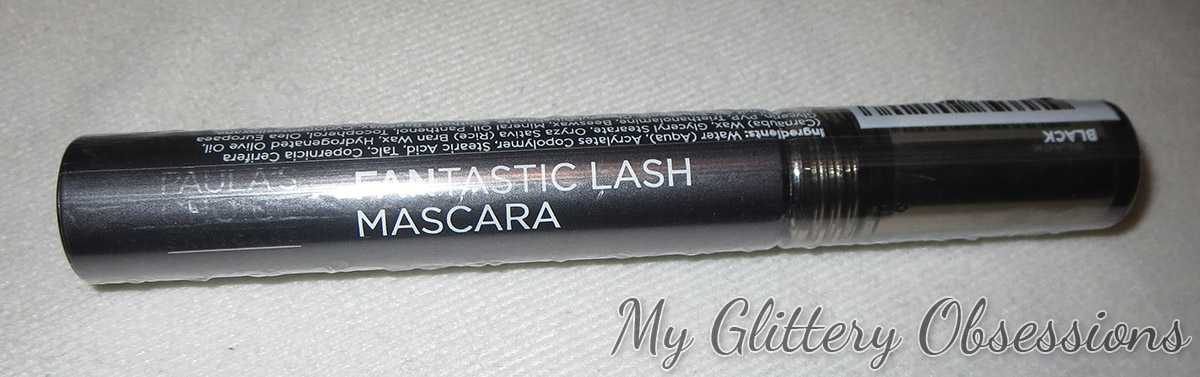
Mascara

This is a regular (read: non-waterproof) lengthening mascara. It has a bendy, narrow brush with soft plastic spike bristles. It retails for $12 USD on the Paula's Choice site.
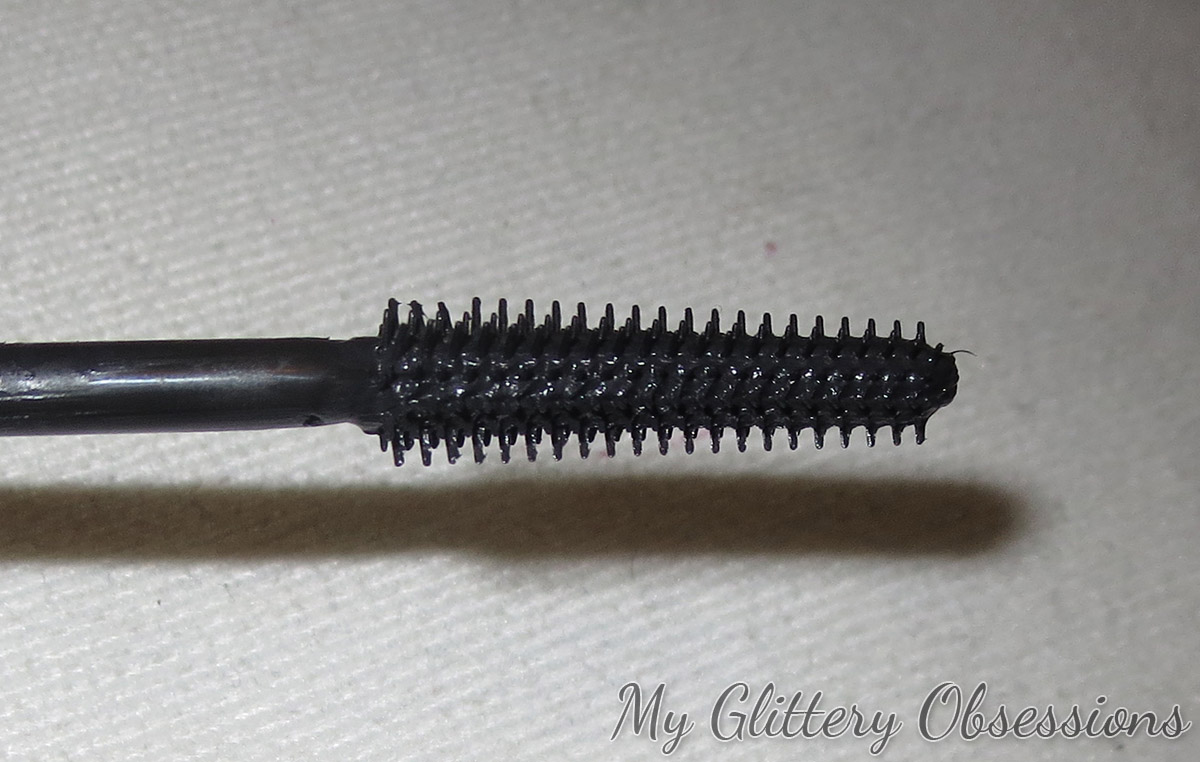
Mascara wand

This is not my favourite type of brush, for sure. The spikes are pretty widely spaced, and I didn't find it did much for separating. So if you love the voluminous, lots-of-lashes look like I do, it may not be for you, either. The texture is nice: not too wet or dry, and it doesn't dry too hard and crunch, which is great, but it is still firm enough to hold some curl. It does make lashes look long and spiky, so if that's your look, and you don't need waterproof, you could give this one a go!

Gentle Touch Makeup Remover
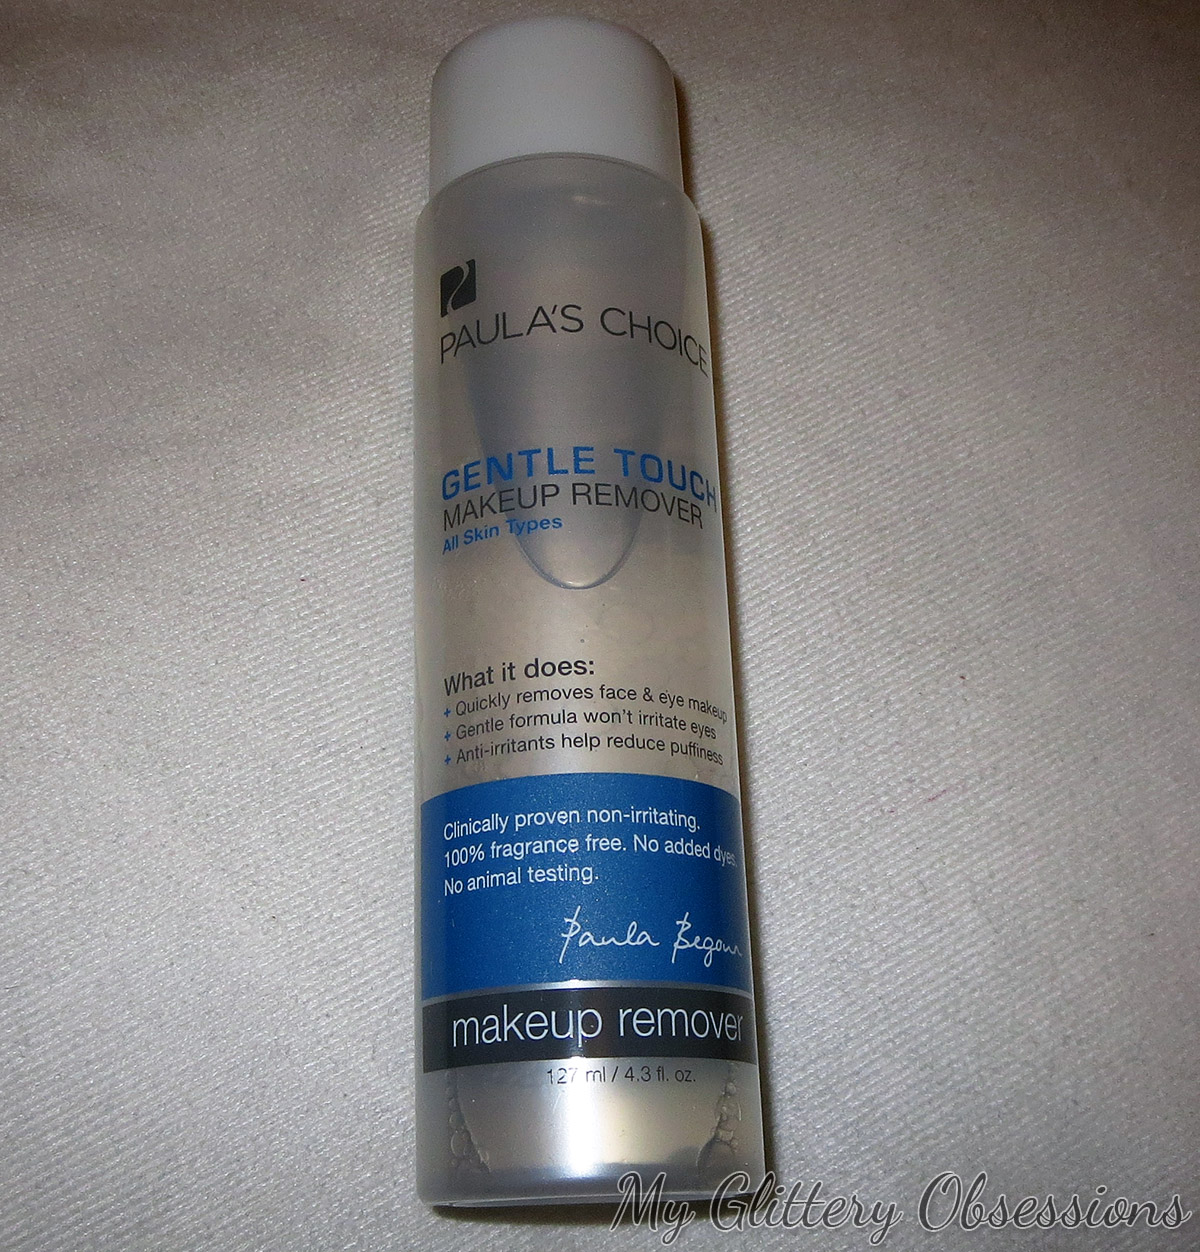
makeup remover

This is a bi-phase makeup remover promises to remove even waterproof makeup easily without irritating skin or eyes. Specially formulated for use around the eyes, but works all over the face, including lips. Contains antioxidants, and is free of colourants and fragrances. Retails for $15 USD on the Paula's Choice website.

While I did think it was pretty great to include a makeup remover in a PR package full of makeup products, I was not expecting to like this as much as I do! It's actually probably my favourite thing I recieved in this whole post, which just proves that skincare really is what Paula's Choice is best at. It's non-oily and doesn't leave a ton of horrible residue on your skin. Contains tea extract and aloe to soothe. And it really does remove even waterproof mascara quickly and easily! I'm not sure what else you could possibly want from a makeup remover! With the exchange rate, though, it becomes almost $20 CAD for a makeup remover... you'll know if that price is worth it to you or not.

***

Overall, although most of these products were still pretty good, none were spectacular or super special, in my opinion. I think the coolest is probably the lip glosses, assuming you like lipgloss, but unfortunately I don't really. Still, just because I don't like things doesn't mean you won't so if someone above sounded like your kind of thing, I would say you should still give it a go. I just wish they still had those lipstick pencils!

Let me know if you've ever tried any Paula's Choice makeup products and what you thought!

Thanks for reading!

Wednesday, January 27, 2016

My Make-up Base Routine || Foundation, Contour & Brows

Hi guys! Here's a quick video just about my usual base routine. Sometimes I'll switch out my foundation or bronzer/contour, but otherwise, what I do is pretty much the same whenever I wear makeup. Just putting this video out so I can put more focus on my other makeup in some of my tutorials. =)

Also, let me know if you miss my intro, or if you like it better without. Or, if you noticed. =P

Click here to watch in HD, or watch below:

Thanks for watching!

Thursday, November 6, 2014

|| October 2014 Favourites || {video}

My October 2014 favourites. Pretty simple, but with a few more products than I've been mentioning lately. Enjoy!

Option #1: click here to watch in HD, or #2 = watch below:

Thanks for watching!

Thursday, July 31, 2014

{VIDEO} Revlon & Lise Watier Tutorial

And now that you've seen a couple more reviews videos, it's time for another tutorial using some of the better products that I featured from Lise Watier and Revlon! Do let me know if there are any other products from any of the brands that I have reviewed, or that I have mentioned in the past, which you would like to see demonstrated in a tutorial, and I'll try to work that in for you!

As always, click here to watch in HD, or there's the player embedded below:

Thanks for watching!

Saturday, May 24, 2014

Video: Perfect Sick Day Makeup | No-Makeup Makeup Tutorial

Hello again, just wanted to share my latest video with you all. I perfected this makeup look the last time I was sick about a month ago. I don’t like to look for feel too made up when I’m feeling sick, because I feel like I’ll just rub my eyes and spread glitter everywhere, but I don’t want to go makeup free, because then I feel even worse, because I know I look as sick as I feel. I think this look strikes a good balance, hiding imperfections and brightening, without being heavy or messy, and having great staying power.

If you’re interested, click here to watch in HD on YouTube, or watch below:

Thanks so much for watching, and please be sure to subscribe, like this video, and comment! Have an awesome weekend!

<3

Saturday, May 3, 2014

March/April 2014 Favourites!

Hello again, lovely readers!

You may have noticed that last month I didn’t post a favourites post or video for March, which was because I didn’t really have much to share. However, I wanted to make sure that I did one this month, so I’m combining my favourites from the past two months for this post. I don’t have a lot to share, but let’s just get into it.

I did also film a video, if you’re intersted, so as always, click here to watch in HD, or below I’ll embed a lower-quality version of the video.

 
That said, here were my beauty favourites from the past two months:

1. Make Up Forever Aqua Black Waterproof Cream Eye Shadow

IMG_0819
IMG_0732
This stuff if my new god. I’d been wanting to try this forever, but it was really Urban Decay coming out with all their new eyeliners that pushed me to try this one. Which sounds weird, but I realised that though I wanted to try the UD cream liner, this one was older, better established, I’d heard great things about it, plus it is cheaper and larger… So I went for this one. And I love it.

I’m terrible with liquid liner, even though I’ve gotten tons better over the years, but this is a hundred times easier. Where with liquid, I always would not want to mess up my nice eye makeup with a messed up line, with this, I’m confident that I can get it thin and opaque right at the lash line. And I love the look it gives, and it is perfectly waterproof and oil-proof in my experience. Love.

2. Forever 21 Sock Bun

IMG_0807
I know I am so late to this party, but these things are fantastic. I picked this up because it was only a dollar at Forever 21, and it is just so easy and pretty! It doesn’t really take much longer than a messy bun once you get your method figured out, and it lasts so much longer, and looks so much classier! There is nothing wrong with this, and I’m completely in love. The only thing I find is that it can be very hard to use on perfectly clean hair, but it is perfect for second- or third-day hair.

3. Maybelline The Rocket Volum’Express Waterproof

IMG_0813
IMG_0814
This is the mascara I bought in hopes of finding a new Maybelline Turbo Volum’Express… and I can’t believe it worked out! I usually hate rubbery brushes, but this one is fantastic! It’s not too spiky and prickly, so I don’t feel like it scratches as my lash line when I get in really close to the base, and one coat is great for black, defined lashes, and it really makes you look like you have a ton of individual lashes. With a second coat, the volume really builds up, but without clumping up. Definitely a new favourite!

4. ELF Eyebrow Kit in Light

IMG_0816
I first bought this because my favourite YouTuber, shaaanxo, uses this product all the time, and her brows are fantastic. Granted, part of that is that she just has naturally gorgeous brows, but this product certainly doesn’t hurt! It’s super easy to get a really well-defined, bold brow by using these two products together, and I find it a lot more precise, and also a better colour, than my past favourite brow product: the NYX auto brow pencil in taupe. . . though I’m still faster with a pencil. Also, the gel/wax side of this really helps to hold your brows in place, while the powder sets it for crazy staying power.

Non-beauty Favourites:

1. Floral Kimono from Forever 21

IMG_0810
The picture above doesn’t really tell you much, but this is just a pretty, floral kimono from Forever 21. I bought this as a replacement for my hoodies and sweaters, as I overheat easily, so I don’t want anything too heavy, but I like stuff to cover my arms and shoulders most of the time. Kimonos are also a lot prettier and more fashionable than hoodies, which I feel like make me look like a highschooler. They only have it in plus-size on their site, but this is what it looks like on. I’ve been wearing it with everything, and I would love to have a few more!

2. Fly Catbug Fly! (cellphone game)

IMG_0826
This game is available on both Android and iOS for $0.99, I think. It’s simple and fun, and completely adorable. If you’ve ever seen Bravest Warriors, then you’ll have some idea what to expect from this, maybe. If you haven’t, Bravest Warriors is an online, animated series of short 2-10 minute episodes. It’s goofy, sometimes a little weird, and from time to time just stupid, but Catbug is completely adorable, and makes it all worthwhile! Now you can play with him and make him pick stuff up, collect money, and dress him in weird clothes. <3

3. A Game of Thrones by George R. R. Martin

IMG_0823

I absolutely love this show, which you might already know if you’ve been reading a while, but I finally started in on the first book a little while ago, and it’s phenomenal! Its very close to the show, though long as hell, but it has tons of extra stuff that never made it into the show, which is super fun to read. I also love being able to experience such a cool and well-designed world in a new way. Though that may just be my love of reading. Although I’m more than half-way through this book, I won’t be hurrying through all of them any time soon, as I love the show too much to spoil it by reading ahead. As such, please do not leave any spoilers in comments or anything. Spoilers are just mean, and your God(s) will hate you if you spread them.
 
***
 
And that’s everything for the past two months! I hope you found that interesting or useful in some way. My next two videos will be a Spring-y Green Eye GRWM and a Sick-Day Makeup Tutorial (basically a no-makeup makeup look), so those will be up May 10th and May 17th respectively. I also hope to finish up my Spring Fashion/Makeup Wishlist post and have that up in the next couple weeks, so make sure to check back for those posts, and subscribe to my YouTube channel to get my videos as soon as they are posted!
 
I would love to hear about your favourites recently, so make sure to tell me in the comments.
 
Thanks for reading!

Sunday, March 16, 2014

My Top 10 Favourite Products Under $10

Sorry about the lateness of this post, I meant to have it up yesterday the same time as my video, but broken internet and school work got in my way, and I never got around to writing it up. But here it is!

If you haven’t seen it yet, you can either watch my video below, or click here for the HD version as usual.

Anyways, let's get onto the products, in no particular order. . .

1) Maybelline Color Tattoo in Bad to the Bronze:

In case you don't know about these things yet, they are cream eyeshadows that set quickly and then don't move or crease all day. They are so easy to wear, and there are a few ways to use them. You can use them on their own, either for a sheer wash of colour, or build it up to be more opaque. They also make excellent bases for other shadows, though that's not how I personally use them most of the time, because this shadow is so good on its own. I picked this colour because I think it is the prettiest and most versatile. Probably my favourite way to wear these is to put a somewhat sheer coat over my lid to about the crease, and then build up more on the outer corner, or outer third. This makes it look like I've put on way more products than I actually have!

2) Rimmel Stay Matte Pressed Powder:

I have gone through several of these powders, and I think they are excellent, and certainly the best I've found so far. They have a few colours, but they are all fairly pale. I've used about 4 different colours, and there isn't too much difference to them, so if you aren't pale, then they might not have a colour that will work for you, unfortunately. Anyways, this is another versatile product for me, I like to use it both on its own or to set foundation. Some powders I've used get cakey over foundation, but this one works really really nicely, and it really seems to help my makeup stay all day.

3) Wet'n'Wild H20 Proof Liquid Liner in Black:

I've never had a problem with this, aside from a little bit of transferring to my upper lids if I'm not wearing eyeshadow, though I have very oily eyelids. That said, it's never happened when I was wearing shadow, so I don't really think it's something to complain about. It lasts a really long time, and it doesn't crease,smudge, or crack like some liners I've tried. I also love that it has a felt-tip point instead of a pointed brush since those are the liners I get along with best.

4) ELF Studio Powder Brush:

IMG_0662

I see no reason to spend lots of money on brushes, when ELF’s Studio line is so soft and lovely on their own! I like to use this one for applying powders, like the name suggests it is for, and I find that it applies product really nicely. This brush would also be great for applying liquid foundations, though, as well.

5) NYX Auto Eyebrow Pencil in Taupe:

A simple, but good product. This is just a mechanical eyebrow pencil. It does have a slightly different shape from your average round pencil, the colour is in a slightly oblong shape, which allows you to more naturally draw on/fill in your brows. I find that they lasting power is really good, even without a brow gel, and I've never had any problems with smudging or fading.

6) Essence I <3 Stage Eyeshadow Base:

IMG_0658

I like this at least as much as Urban Decay's Primer Potion, and far more than the ELF shadow bases. This primer has a slight tint, which I like, since it helps to cover up the veins that are very visible sometimes on my pale lids. The product is great for holding colour and amping up the pigmentation of not-so-great shadows, and I've never had any problems with creasing or fading while wearing this primer!

7) St. Ives Green Tea Scrub:

IMG_0653

It's a little odd for me to fall in love with a face product, but I really love how this makes my skin feel. It makes my skin feel smooth, but without the tightness that some products make my face feel. It's also not too harsh and scratchy, and has salicylic acid in it to help fight acne, which I do think it does pretty well.

8) Essie Millionails Nail Treatment:

This product is only just within the price range, but it is well worth it's $9.99 price tag. It's basically Essie's version of OPI's Nail Envy, and it is just as good, exactly the same size, but maybe half the price! It makes my nails strong and the grow so much better when I'm using this as a base coat for my manicures. I strongly recommend this for anyone whose nails need some help!

9) CoverGirl EyeEnhancers Shadow in 710 Champagne:

IMG_0667

IMG_0674

This individual shadow was the eye shadow that taught me that eyeshadow could be pretty, and I still really love it. I used to use it all over the lid, and that's still pretty for a very subtle look, but my favourite way to wear this now is as a highlight, both on the browbone or on my inner corners.

10) Maybelline Vivids Lipstick in Vivid Rose:

IMG_0677

IMG_0679

This is the only shade I've tried of this line, but it is gorgeous, bright, pigmented, and longwearing! What's not to love? There are lots more colours in the line, as well, and they are all bright in their own way (as you might expect from a line called "Vivids"). I'd love to try more. These are definitely my favourite lipsticks from the drugstore. They almost, but only almost, rival MAC Amplified lipsticks for quality... and I really like MAC Amplified lipsticks...

***

So that's everything! Thanks for reading! Don't forget to let me know, either here or on my video, what your favourite products under $10 are!

Saturday, December 21, 2013

Christmas Makeup Tutorial/Inspiration

With only a couple more days until Christmas (3, to be exact), I thought it would be fun to do a festive, Christmas-y makeup look. I don’t have step-by-step pictures for you, but this look is very simple to recreate, and I will give you a list of the products I used, and a quick description!

To start off, here’s the look:

100_3390

Sorry this first one is so washed out… For some reason the camera decided my skin was pure white for this shot! I swear the rest will be better…

100_3408

100_3393

100_3401

And a close up of the eye makeup:

100_3391

Obviously, if you have similar colours, you can use whatever products you have at hand, but here’s what I used:

Lancome Color Ideal Foundation:

100_3410

I honestly don’t think they make this foundation anymore, but I still have this and its still fine, especially since it has a pump so my fingers have never been in it. Anyways, I used this with my flat-top Real Techniques Buffing Brush in a thin coat all over my face. Followed by:

Maybelline Instant Age Rewind Concealer in Fair:

100_3411

Under my eyes and in a triangle on either side of my nose to highlight the center of my face. I don’t have much in the way of dark circles, but this helps my makeup to look more flawless, and I feel like it—and the powder of top of it—help to keep my eyeliner in place. Next, I used my:

Rimmel Stay Matte Pressed Powder in Sandstorm:

100_3416

Over my foundation and concealer to set and mattify everything, and to make sure it says in place all day. Next, I took my

ELF Eyebrow Kit in Light:

100_3415

I used an Angled liner brush from Morphe with the gel side first to shape and darken my brows, followed by the powder to set the gel and fill in sparse areas. I like to do my brows first because then I don’t over do it on my eyes, and that way I don’t forget. After that, I used my:

Urban Decay Primer Potion:

IMG_0089

To prime my eyes to make sure my makeup lasted, of course. Then I topped the primer with:

Urban Decay eyeshadow in W.O.S. (from the Naked Basics palette):

IMG_0047

IMG_0048

You haven’t seen the Naked Basics palette on my blog yet, I don’t think, but you will soon. Anyways, I just wanted to use a shadow that was basically the same colour as my skin to make sure my eyelids looked matte, clean, and bright, since I have thin eyelids. Also, I find that my eyelids are just oily enough to make my eyeliner transfer if I don’t wear it over eyeshadow, so this helped with that as well. Next, I used:

Wet’n’Wild H2O Proof Liquid Liner in Black:

IMG_0093

To line my upper lash line and to create a wing, followed by:

Annabelle Glitterama Liquid Liner in Neon Green:

IMG_0094

After drawing on the wing in the black liner, I traced just above that line with the green glitter liner. I had to do 2 thin coats to make it look this glittery and bright, but I really love how it came out. Next, of course, I added:

Urban Decay 24/7 Liner Pencil in Zero:

IMG_0086

To line my lower waterline. (If you find that liner in your water line tends to slide from the outer corners down into weird smudges, like mine loves to do, I would suggest using an angled brush and a matte black eyeshadow and press that into the edge of your liner, just below your lower lashes. I find that helps to prevent some of the smudging, if not all, and keeps my makeup looking cleaner, longer.) And to finish up my eyes, I added:

Rimmel Scandaleyes Waterproof Mascara in Black:

100_3417

To make sure I had eyelashes! I used about three coats of this mascara, since I find it goes on fairly thin. The upside of this formula is that I don’t find it really ever creates clumps, even after three coats. But the downside is that I have to do three coats to make my lashes look how I want them to. I’m pretty meh on this mascara. I don’t hate it by a long shot, but I wouldn’t choose it again.

If you wanted even more drama, you could definitely add some falsies, but for this look I stuck to just the mascara.

Now that the eyes are done, there are just two more steps to this look:

MAC Mineralize Skinfinish in Soft And Gentle:

100_3424

I used my Morphe fan brush and swiped this along the tops of my cheekbones, the bridge of my nose, my cupid’s bow, and just under my eyebrows. I love this highlight, but if you use it, make sure to use the tiniest amount, since it is insanely shimmery! I just swipe my brush into the product lightly, tap it off, and that is more than enough for me to highlight everywhere I want to do so!

Finally to finish off my look I added:

Sephora Lip Attitude Lipstick in Chic:

IMG_0100

Green and red is such a Christmassy combination, so to complete this look I figured a classic red lip was in order. This is my favourite red lipstick, but I’m not sure if it’s still available. It’s Sephora’s own brand, and the colour is Chic… unless it’s C27. Either way it’s gorgeous and I love it, but any classic-red lipstick will do!

And that’s all! Spritz with a makeup setting spray to make sure it lasts all day long (I use Urban Decay’s All-Nighter), and you’re good to go.

***

This look is really simple, so I think it would be good for just about anywhere that you might want to wear it! You could also, substitute the green liner for gold or silver glitter for a slightly different look, but I really love the green and red together, since it looks so subtly Christmassy. Or maybe it’s not that subtle. *shrugs* I wore this out shopping at the mall today, but I think it would also be great for Christmas parties, Christmas dinner, or maybe even as a simple New Year’s Eve look!

Anyway, I hope you liked this or took some kind of inspiration from it for yourself.

Thanks for reading, and Merry Christmas!

LinkWithin

Related Posts Plugin for WordPress, Blogger...